jQuery EasyUI Form - Form Verification
May 09, 2021 jQuery EasyUI
Table of contents
jQuery EasyUI Form - Form Verification
This section describes how jQuery EasyUI form validation is implemented, and the EasyUI framework provides a validatebox plug-in to validate a form.
The following example shows you how to validate a form, we'll create a contact form, and we'll apply the validatebox plug-in to validate the form. You can then adjust the form to your needs.
Create a form
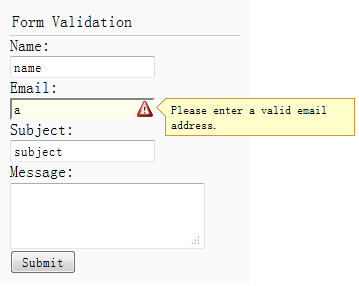
Let's create a simple contact form with the name, email, subject, and message fields:
<div style="padding:3px 2px;border-bottom:1px solid #ccc">Form Validation</div>
<form id="ff" method="post">
<div>
<label for="name">Name:</label>
<input class="easyui-validatebox" type="text" name="name" required="true"></input>
</div>
<div>
<label for="email">Email:</label>
<input class="easyui-validatebox" type="text" name="email" required="true" validType="email"></input>
</div>
<div>
<label for="subject">Subject:</label>
<input class="easyui-validatebox" type="text" name="subject" required="true"></input>
</div>
<div>
<label for="message">Message:</label>
<textarea name="message" style="height:60px;"></textarea>
</div>
<div>
<input type="submit" value="Submit">
</div>
</form>We add a style named easyui-validatebox to the input tag, so the input tag will be validated according to the validType property application.
Block form submission when it is invalid
When a user clicks the submit button of a form, we should prevent the form from being submitted if it is invalid.
	$('#ff').form({
		url:'form3_proc.php',
		onSubmit:function(){
			return $(this).form('validate');
		},
		success:function(data){
			$.messager.alert('Info', data, 'info');
		}
	});
If the form is invalid, a prompt is displayed.