Spring environment configuration
May 14, 2021 Spring
Table of contents
Environment settings
This tutorial will show you how to prepare your development environment to start your work with the Spring framework. This tutorial will also teach you how to install JDK, Tomcat, and Eclipse on your machine before installing the Spring Framework.
Step 1: Install the Java Development Kit (JDK)
You can download the latest version of JDK from Oracle's Java website, Java SE Downloads. Y ou'll find instructions in the downloaded file that teach you how to install the JDK, follow the instructions given to install and configure the settings for the JDK. Finally, set the PATH and JAVA HOME environment variables to introduce directories that contain java and javac, typically java install dir/bin and java install sdir, respectively.
If you're running Windows and you have JDK installed on C:jdk1.6.0_15, you can write the following line to the C:?autoexec .bat file.
set PATH=C:\jdk1.6.0_15\bin;%PATH%
set JAVA_HOME=C:\jdk1.6.0_15
Or, in Windows XP/7/8, you can right-click My PC, select Properties, then Advanced, and then Environment Variable. Next, you'll update the PATH value and press the OK button.
On Unix (Solaris, Linux, etc.), if you install the SDK on /usr/local/jdk1.6.0_15 and use the C shell command, you need to add the following to the .cshrc file.
setenv PATH /usr/local/jdk1.6.0_15/bin:$PATH
setenv JAVA_HOME /usr/local/jdk1.6.0_15
Or, if you use an integrated development environment (IDE), such as Borland JBuilder, Eclipse, IntelliJ IDEA, or Sun ONE Studio, compile and run a simple program to confirm that the IDE knows you have Java installed, otherwise you should set it up correctly based on the documentation given by the IDE.
Step 2: Install the Apache Commons Logging API
You can download http://commons.apache.org/logging/ version of the Apache Commons Logging API from the website. O nce you have downloaded the installation package and unziwed the binary release to a convenient location. F or example, in C:\commons-logging-1.1.1 on windows, or in /usr/local/commons-logging-1.1.1 on Linux/Unix. The directory will have the following jar files and other supported files, etc.
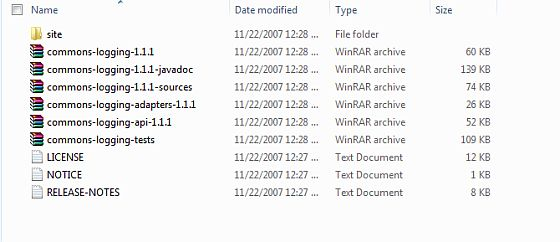
Make sure that you set the CLASSPATH variable correctly in this directory, otherwise you will have problems running the application.
Step 3: Install the Eclipse IDE
All the examples in this tutorial are written using eclipse IDE. So I suggest you install the latest version of Eclipse on your machine.
To install the Eclipse IDE, tap the URL http://www.eclipse.org/downloads/ download the appropriate version based on the operating system number (32 or 64 bits).

Step 4: Install the Spring Framework Library
If the first three steps are all right, you can continue to set up your Spring framework. Here are the easy steps to download and install the framework on your computer.
-
Choose whether you want to install Spring on Windows or UNIX, then proceed to the next step, download the .zip file on Windows, and download the .tz file on Unix.
-
Download the corresponding Eclipse version of Springsource-tool-suite from Spring Official.
-
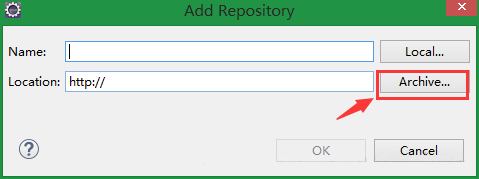
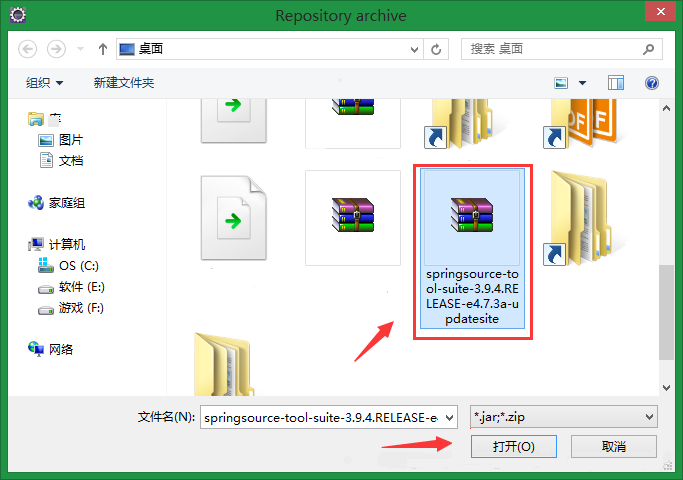
Install springsource-tool-suite
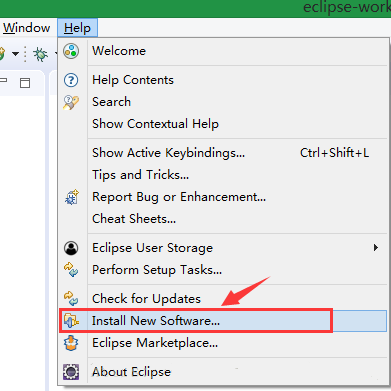
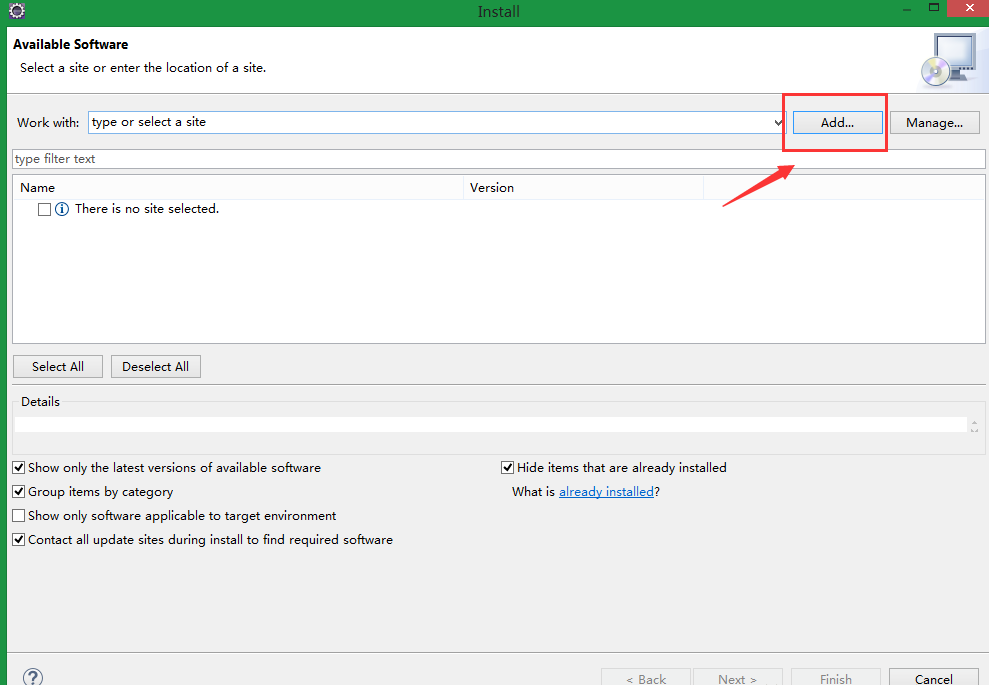
Eclipse - Help - Install New Software - Add - Archive - Select the springsource-tool-suite package you just downloaded -- Open -OK
-
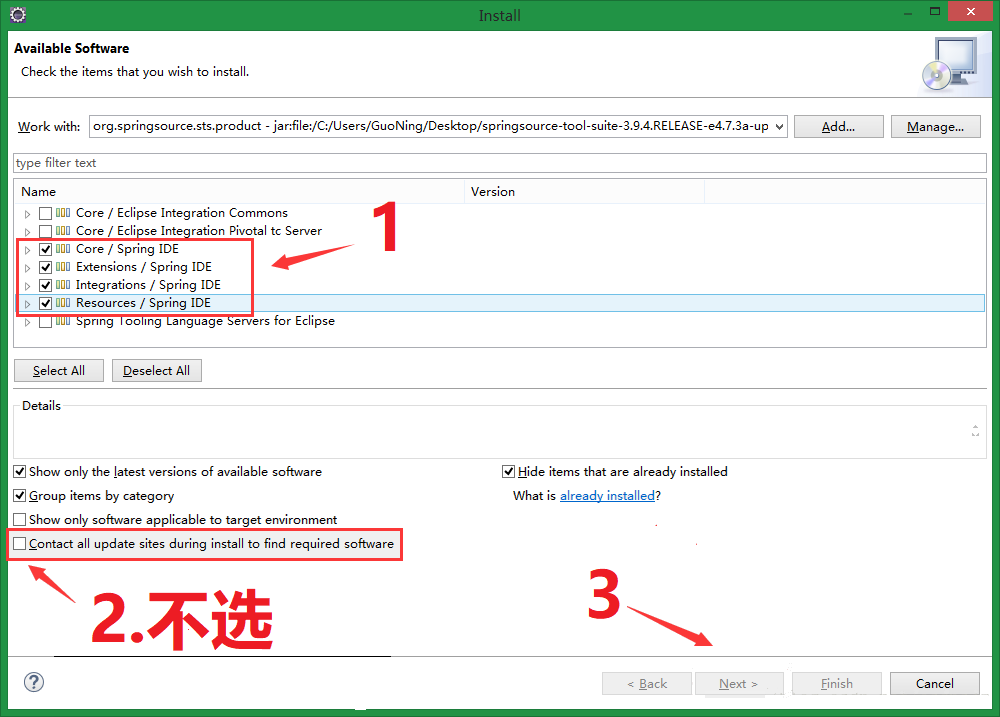
Select the components to install: 4 components labeled "IDE" are selected:
-
Point "Next" all the way, and finally "Finish". Waiting for installation.
When the installation is complete, click "yes" in the pop-up dialog box to restart eclipse.
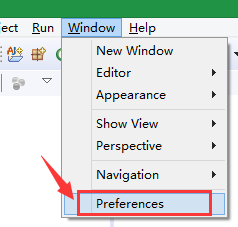
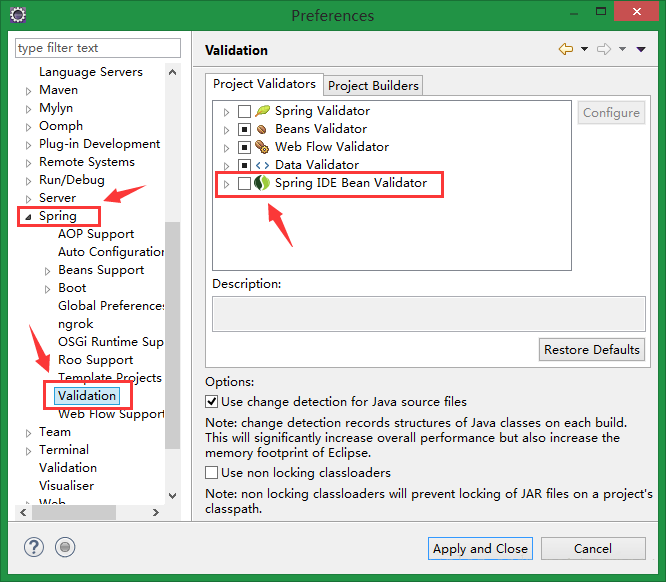
If it goes well, you've installed the Spring plug-in and clicked "Window" -- "Preferences" to see if the installation was successful:
-
See the icons of the two green leaves in the figure below, indicating that they have been installed successfully:
Add:
You can also use IntelliJ IDEA for quick configuration
See the official IntelliJ IDEA documentation for specific installations