9.1.1 Configure the network card parameters
May 24, 2021 That's what Linux should learn
Up to now, we can use what we have learned to manage Linux systems. Of course, everyone's level can go further, and when you one day reach the top of the technology, you will be grateful to you who are now trying to learn.
We'll next learn how to configure services on Linux systems. B efore doing so, however, it is important to ensure smooth communication between hosts. If the network is not connected, even if the service is deployed correctly, it is not possible to access it smoothly, so configuring the network and ensuring network connectivity is the last important point of knowledge before learning to deploy Linux services.
In the 4.1.3 section explains how to use the Vim text editor to configure network parameters, in fact, in the RHEL 7 system there are at least 5 network configuration methods, Mr. Liu Wei try to show you one by one in this book. W hat we are taught here is to configure the network using the nmtui command, the specific configuration steps of which are shown in Figures 9-1 to 9-8. When faced with content that is not easy to understand, we will explain it additionally.
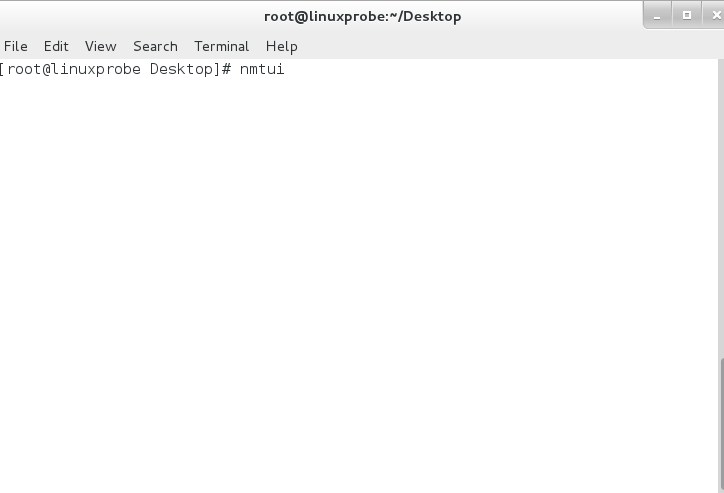
Figure 9-1 executes the nmtui command to run the network configuration tool
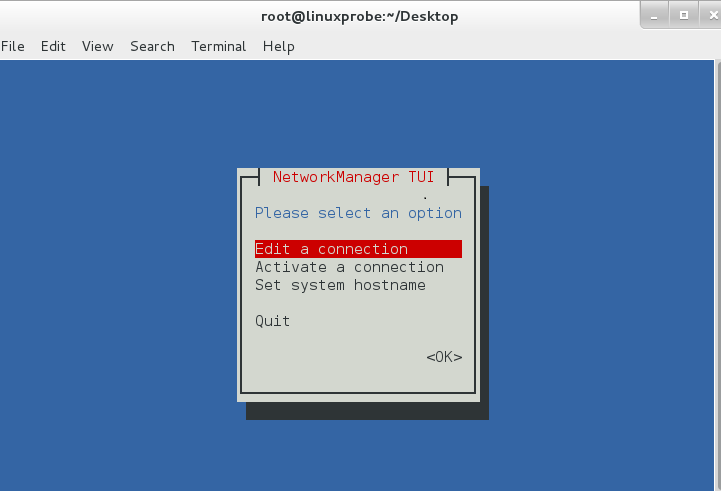
Figure 9-2 SelectEd a connection and press enter
In RHEL 5, RHEL 6, and most other early Linux systems, the name of the network card has always been eth0, eth1, eth2、......, but in RHEL 7 it has become a name similar to eno16777736. However, with the exception of a change in the name of the network card, almost everything else is business as usual, so the network configuration experiment demonstrated here is perfectly suitable for various versions of Linux systems.
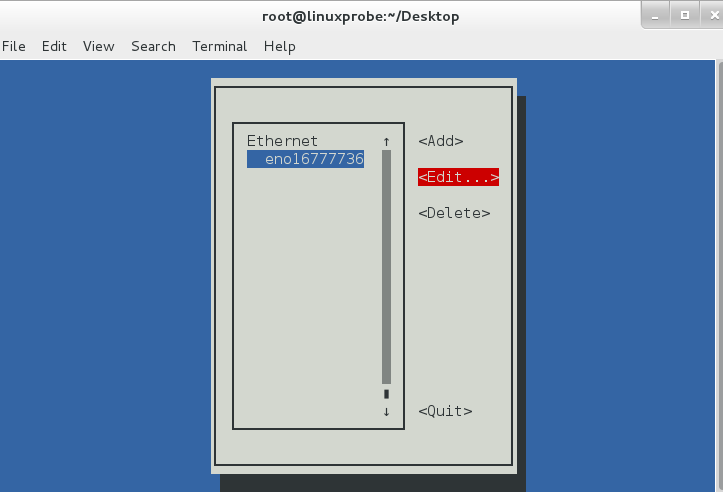
Figure 9-3 Select the name of the network card you want to edit, and then press the Edit button
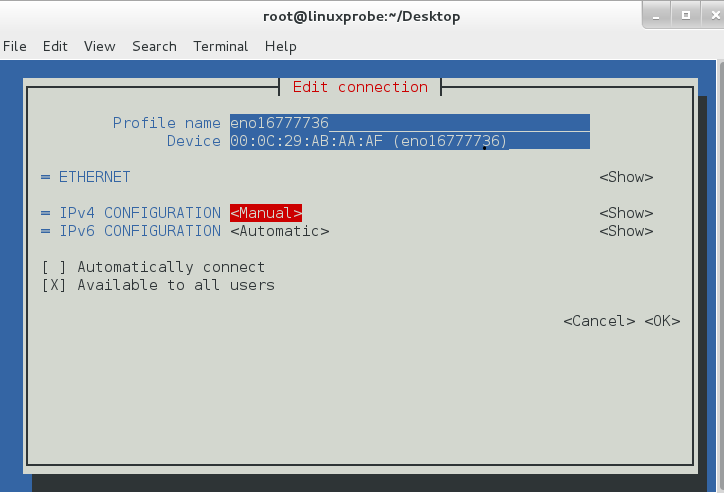
Figure 9-4 Change the configuration of network IPv4 to Manual (manual)
More to the point, our "Linux should learn this way" is not only a low learning threshold, easy to understand, but also has a potential advantage - all the server host IP addresses in the book are 192.168.10.10, and the client hosts are 192.168.10.20 and 192.168.10.30. The advantage is that when you deploy Linux services later, you don't have to think about IP address changes every time, so you can focus on the configuration details.
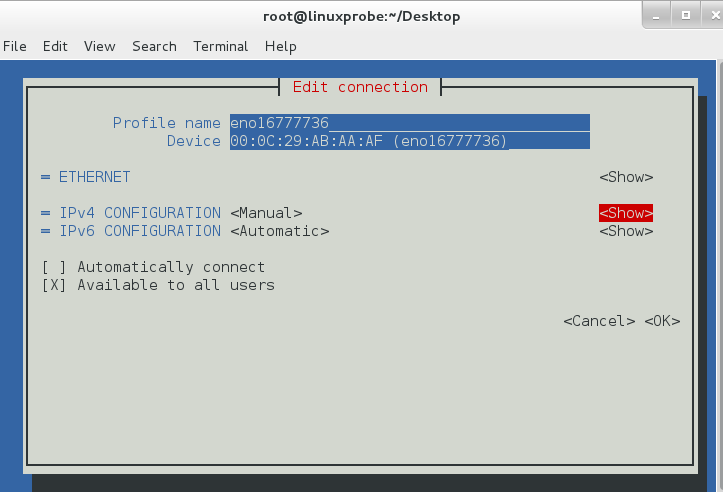
Figure 9-5 Press the Show button to display the information configuration box
Now fill in the IP address 192.168.10.10/24 in the network configuration information of the server host.
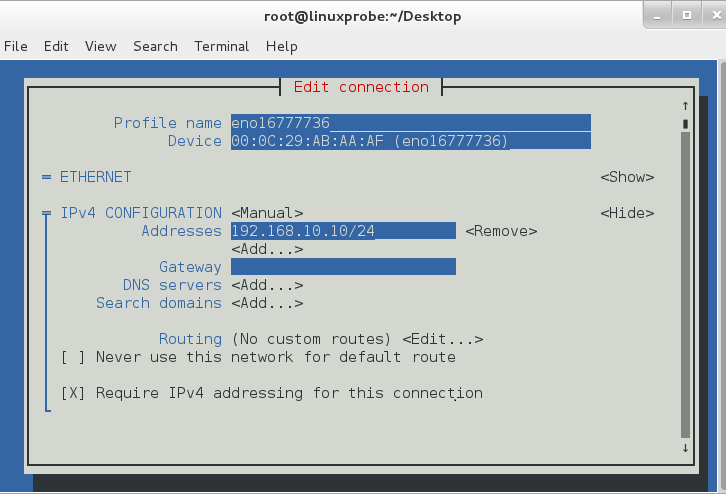
Figure 9-6 Fill in the IP address
At this point, the steps to configure the network in a Linux system are over.
During the training, Mr. Liu often finds that many students do not activate the network card by default when installing the RHEL 7 system. If you have the same situation and don't worry, just use the Vim editor to modify the ONBOOT parameters in the network card profile to yes, so that the network card is activated after the system restarts.
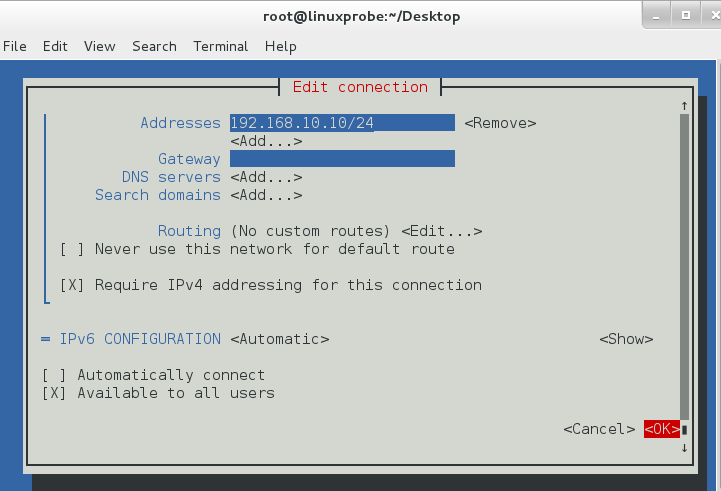
Figure 9-7 Click the OK button to save the configuration
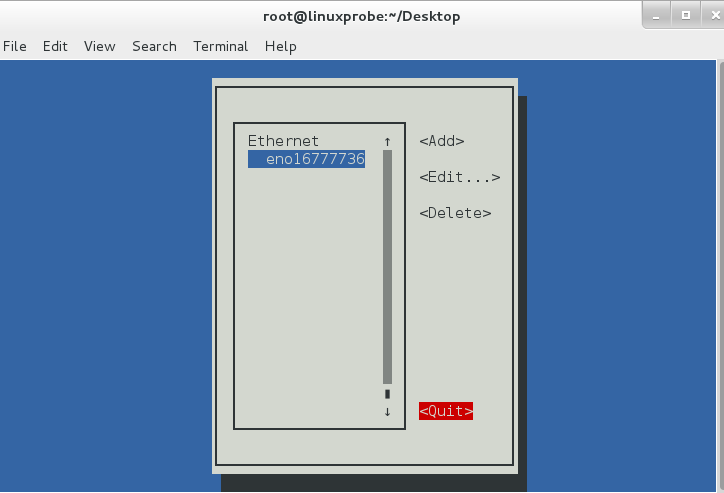
Figure 9-8 Click the Quat button to exit
[root@linuxprobe ~]# vim /etc/sysconfig/network-scripts/ifcfg-eno16777736 TYPE=Ethernet BOOTPROTO=none DEFROUTE=yes IPV4_FAILURE_FATAL=no IPV6INIT=yes IPV6_AUTOCONF=yes IPV6_DEFROUTE=yes IPV6_FAILURE_FATAL=no NAME=eno16777736 UUID=ec77579b-2ced-481f-9c09-f562b321e268 ONBOOT=yes IPADDR0=192.168.10.10 HWADDR=00:0C:29:C4:A4:09 PREFIX0=24 IPV6_PEERDNS= y es IPV6_PEERROUTES is not immediately effective for the service program when the service profile in the Linux system is modified. For the service program to get the latest profile, you need to manually restart the service, and then you can see that the network is open:
[root@linuxprobe ~]# systemctl restart network [root@linuxprobe ~]# ping -c 4 192.168.10.10 PING 192.168.10.10 (192.168.10.10) 56(84) bytes of data. 64 bytes from 192.168.10.10: icmp_seq=1 ttl=64 time=0.056 ms 64 bytes from 192.168.10.10: icmp_seq=2 ttl=64 time=0.099 ms 64 bytes from 192.168.10.10: icmp_seq=3 ttl=64 time=0.095 ms 64 bytes from 192.168.10.10: icmp_seq=4 ttl=64 time=0.095 ms
--- 192.168.10.10 ping statistics --- 4 packets transmitted, 4 received, 0% packet loss, time 2999ms rtt min/avg/max/mdev = 0.056/0.086/0.099/0.018 ms