Chapter 11 Virtual and Physical Devices
May 21, 2021 Android SDK Getting started
Table of contents
Chapter 11 Virtual and Physical Devices
In previous articles, you've learned about the basic elements of android projects, the design of user interfaces, and data storage scenarios. N ext, we'll explore how to run and interact with your own applications on physical and virtual devices. I n the next installed article in the series, we'll walk through how to get your application running on physical devices and simulators. In today's tutorial, I'll take you first to learn how to set up physical and virtual devices in Eclipse.
When you develop an Android application that will be released publicly, you must test your products in the physical real machine and simulator in advance. I n terms of simulators, we can configure virtual devices with a variety of hardware and software features. W hile this processing may not be as reliable as it really is on a variety of physical devices, it is enough to help us understand the difference between the device at hand and the Android device that may come into contact with the outside world. Certain hardware and software features are not available in the emulator, but you can still test most of the features in your first application.
1. Hardware devices
The first step
When developing Android applications, you should first focus on how the results work on physical hardware devices. I n addition to actually bringing us the look and feel of the application, the user experience, and user capabilities, hardware devices are the only way we can test specific features, such as calling. If you have exactly one hardware device at hand during development, you can also configure the simulator to have hardware and software capabilities that are exactly the same as it is, so that you can run tests while developing.
Let's start by connecting the hardware device to Eclipse. C onnecting Android devices to computers is the USB interface that everyone is familiar with. W e may need to enable USB debugging on the device by opening the device's settings screen, selecting Developer Options, Level Settings, or Applications, and then Selecting Development. T hen check the USB debugging project. I f you're running Android 4.2 or later on the device you're using, you might want the developer options to appear properly with settings. Turn on About Phone, then repeat it multiple times (seven times) in the list, click On Number, and finally return to the previous screen.
Tip: You may also need to make your system automatically detect Android devices when they're connected; If everyone's Windows system can't detect the device, please
Download
and install a USB driver. I f you're using Linux and you're having trouble detecting your device, you might want to use the udev file and check the device manufacturer listed in it. If you still can't figure it out, please
Click here
Check out the instructions in Android's official developer guide.
Step two
Once the system detects the Android device we're connected to, you can interact with it in Eclipse. I n the next tutorial, we'll explain in detail how to handle these efforts. N ow we just need to switch to the DDMS view. I n Eclipse, select Windows, Open View, and then DDMS. Y ou should see the device you're connected to in the device view on the left side of the screen. In addition, you'll see LogCat view start popping up with a message that the processing of the device is in progress.
Next, please take a minute to view the contents of your device through the file view after selecting your device in the device view. W e'll see the files and folders saved on your device. A s you can see, these views allow us to use any accessed device, including running, testing, and debugging our own applications. You can also use the various buttons in the device view, including the screenshot button , and when everything is ready, you may want to capture a few great moments as introductory material for your app.
2. Virtual devices
The first step
Now let's see how to create a virtual device. I n Eclipse, select Windows and click Android Virtual Device Manager (AVD Manager) to turn it on. T wo tabs appear in the AVD Manager, one to display the virtual devices we created and started, and the other to manage reusable device definitions. I n future development, you may need to configure your own AVDs to test some of your app's features in a targeted way, but as an early learning step, we'll find it clearly faster and easier to use existing device definitions directly. Now switch to the Device Definition tab.
You'll see a list of device definitions in the AVD Manager, where we can save the device configuration for future reuse. Y ou can also create your own device definition by clicking the "New Device" button. Once clicked, we'll see the interface shown in the following image.
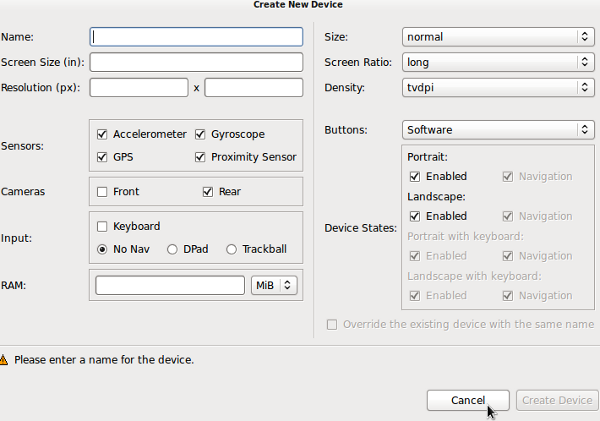
Here, you can configure the hardware and software of the virtual device in all aspects, including screen size, resolution, sensors, cameras, input methods, pixel density, and buttons. A fter a new device is created, the configuration appears in the list of existing definitions. Y ou should try to make a meaningful name for your configuration definition so that we can find it more easily in the list. But now let's test the app with the existing definition and click "Cancel" to exit the current interface.
Step two
You can use existing device definitions in two ways: copy the current device definition directly and modify the properties, or create a virtual device instance directly from the existing definition. Select a device in the list and click Clone.
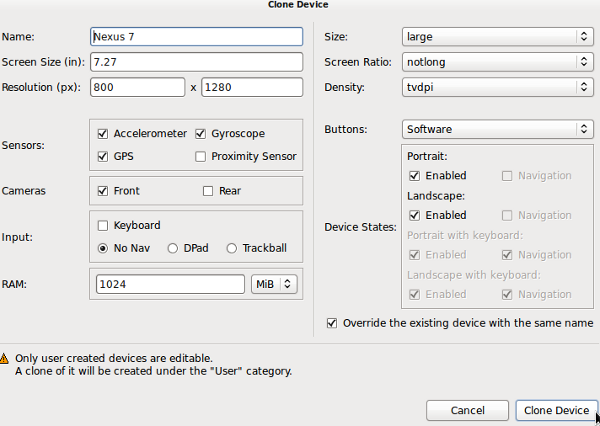
Each input box in the clone device window is automatically populated to match the selected definition. E xisting devices are configured to be essentially the same as our requirements, so all device properties can be preserved by clicking "Clone Devices" directly. A copy of the device definition appears in the list.

As you can see, we can determine at a glance which are the default and which are custom schemes by the color difference between the Android device definition and the user device definition. You can only edit user definitions, so select the clone device you just created in the list and click Edit.
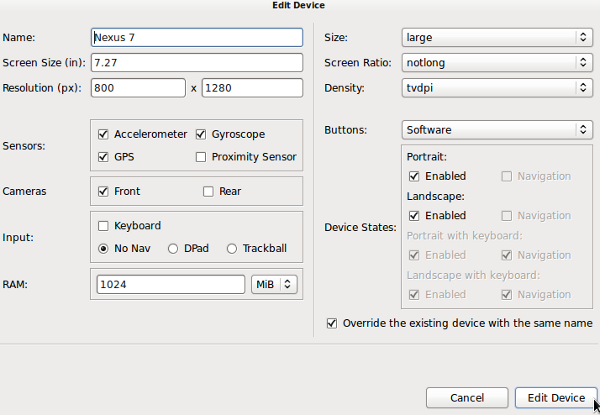
Now we can edit the properties of the device and click Edit Device to apply the configuration scheme when we're done. Now you can create an AVD instance based on the device definitions in the list.
Step three
As long as you create an AVD from the current device definition and run it in the emulator, you can see that one of the device definitions is starting to work. S elect a device definition from the list and click Create AVD. I n the window, we can configure the instance or either keep all the settings in the definition directly. F or more information on the list of AVD options, you can click here for instructions in the Android Developer's Guide. Now click "OK" to create an AVD.

Eclipse switches back to the Android Virtual Devices tab, where our new device will appear. Once the new AVD is selected, click "Start" to put it into operation.
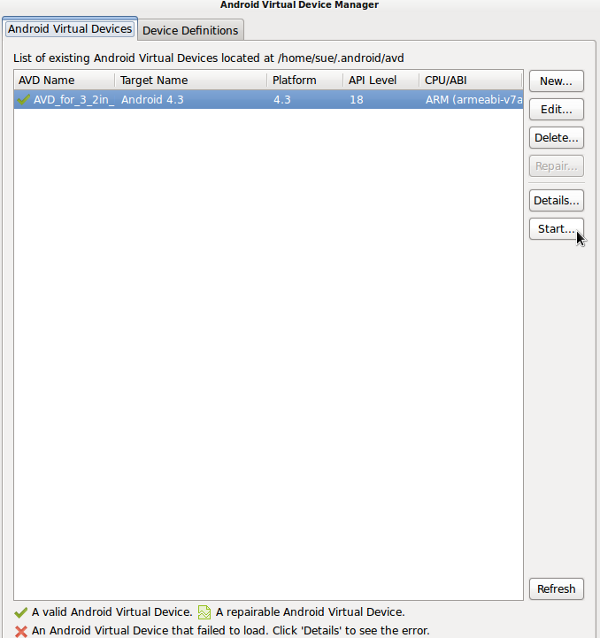
Click "Launch" in the pin window and Eclipse will start running the simulator with our custom AVD. The device may take a few minutes to start, and once the device is already running, everyone can turn off the AVD manager.
Step four
Under the appropriate conditions, the emulator displays a virtual version controlled by the device hardware. P eople can interact with them with a mouse click. I n addition, the emulator supports a variety of keyboard shortcut combinations, which can greatly simplify our daily operations , such as the "Home" key on the device and the "Home" key on the keyboard. You can click here for a list of simulator shortcuts listed in the Android Developer's Guide.
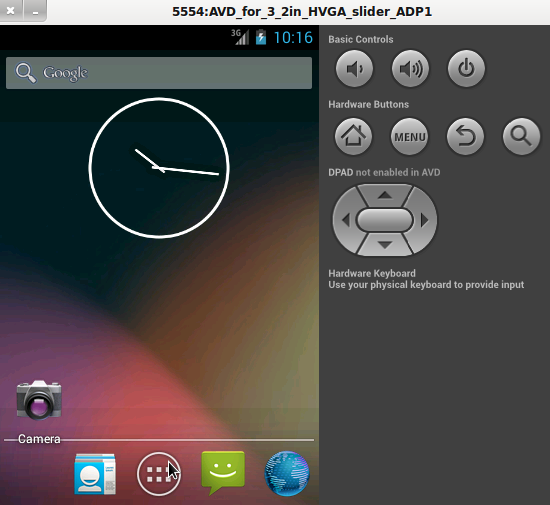
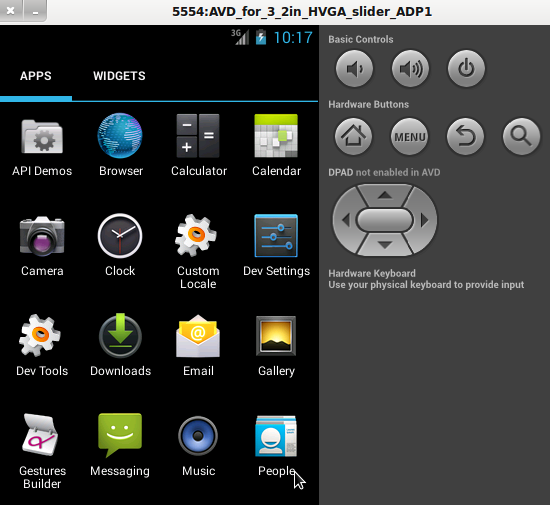
Depending on the AVD you created, we may need to press F2 or click "OK" to unlock the screen. A s you can see, the simulator will show the same effect as a physical device. Now take a minute to explore the virtual device, check out the app menu, and launch a few more apps.
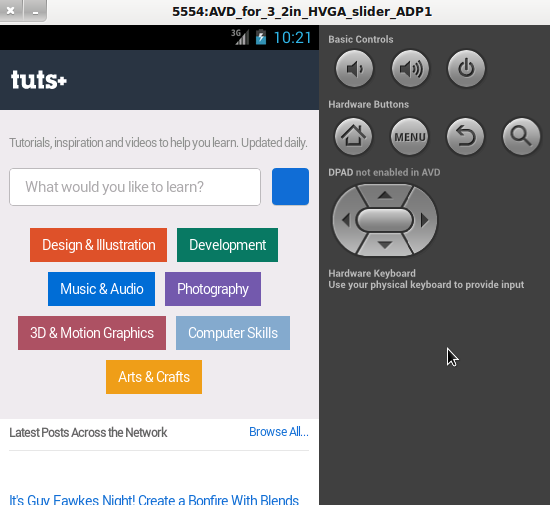
Start the browser app in the virtual device on the front. C lick the navigation bar and enter the URL you want to visit. Y ou can use the computer keyboard as an input device. The emulator automatically uses the Internet connection available on any computer, so we can evaluate its Web connection capabilities while testing the application.
Step five
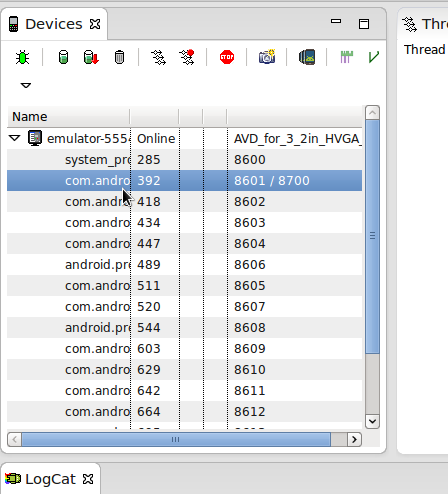
Now leave the AVD running, switch back to Eclipse, and open the DDMS view again. Y ou'll see in the device view that your virtual device is already on the list, alongside a physical device that's already connected. E clipse displays an inventory of all processes running on the current device. W hen a process is selected, we can process it with multiple feature buttons in the device view. Now please take a minute to take a closer look at this interface, which will be a great helper for us in debugging our applications in the future.
Summarize
Now we are familiar with the entire process of using hardware or analog devices in Eclipse. I n the next tutorial, we'll officially start getting the app running on devices from Eclipse. I n a follow-up article, we'll also explore Android Universal Components and theActivity Cycle to help you identify the direction of your future learning. A fter you've developed a few apps, you might also want to go back and re-learn this tutorial series. It is hoped that these articles can be used as a guide and reference for friends in the process of application creation and device interaction.