Spring Hello World instance
May 14, 2021 Spring
Table of contents
2. Step 1: Create a Java project
3. Step 2: Add the required libraries
4. Step 3: Create the source file
Hello World instance
Let's start the actual programming with the Spring framework. B efore you start writing the first example using the Spring framework, you must make sure that the Spring environment is set up correctly, as described in the Spring-Environment Settings tutorial. S uppose you have some knowledge about what eclipse IDE does.
So let's move on to writing a simple Spring application that outputs "Hello World!" based on the information configured in the Spring Beans profile. or other information.
Step 1: Create a Java project
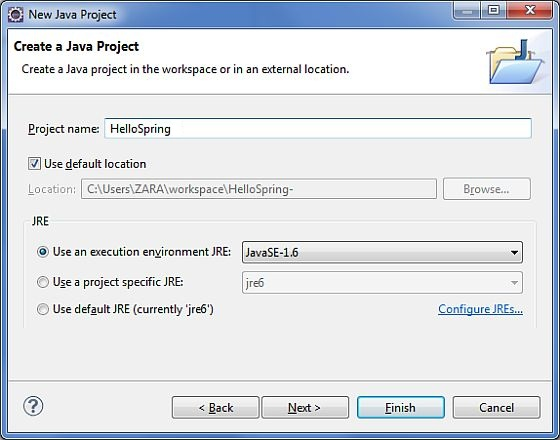
The first step is to create a simple Java project using eclipse IDE. F ollow the option File -gt; New -project and finally select the Java Project wizard from the list of wizards. Now use the wizard window to name your project HelloSpring, as follows:
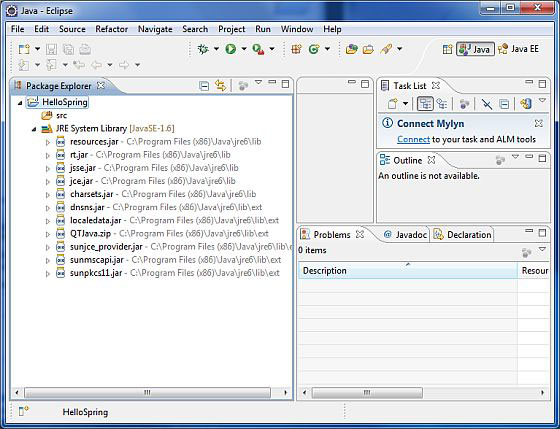
Once your project is created successfully, you'll see the following in Project Explorer:
Step 2: Add the required libraries
The second step is to add the Spring framework and a common log API library to our project. To do this, right-click on your project name HelloSpring, and then follow the options available on the shortcut menu: Build Path -gt; Configure Build Path displays the Java Build Path window, as follows:
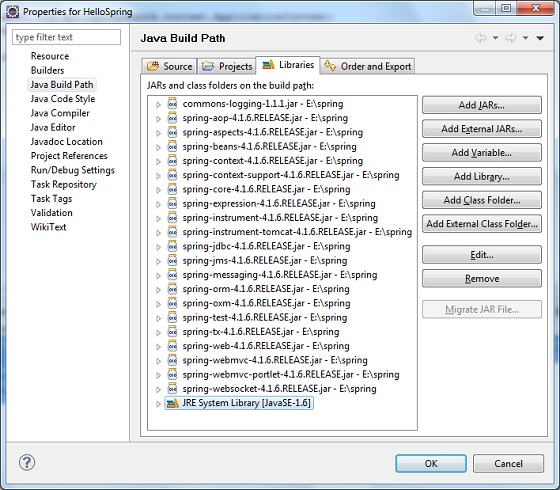
Now, use the available Add External JARs button in the Libraries tab to add the core JAR file below the Installation Directory from the Spring framework and general log:
commons-logging-1.1.1

spring-aop-4.1.6.RELEASE

spring-aspects-4.1.6.RELEASE

spring-beans-4.1.6.RELEASE

spring-context-4.1.6.RELEASE

spring-context-support-4.1.6.RELEASE

spring-core-4.1.6.RELEASE

spring-expression-4.1.6.RELEASE

spring-instrument-4.1.6.RELEASE

spring-instrument-tomcat-4.1.6.RELEASE

spring-jdbc-4.1.6.RELEASE

spring-jms-4.1.6.RELEASE

spring-messaging-4.1.6.RELEASE

spring-orm-4.1.6.RELEASE

spring-oxm-4.1.6.RELEASE

spring-test-4.1.6.RELEASE

spring-tx-4.1.6.RELEASE

spring-web-4.1.6.RELEASE

spring-webmvc-4.1.6.RELEASE

spring-webmvc-portlet-4.1.6.RELEASE

spring-websocket-4.1.6.RELEASE
Step 3: Create the source file
Now let's create the actual source file under the HelloSpring project. F irst, we need to create a package called com.tutorialspoint. Right-click on the src in the package explore area and follow the option: New -.
Next, we'll create HelloWorld and MainApp files .java package com.tutorialspoint .java main.
Here is the contents .java HelloWorld file:
package com.tutorialspoint;
public class HelloWorld {
private String message;
public void setMessage(String message){
this.message = message;
}
public void getMessage(){
System.out.println("Your Message : " + message);
}
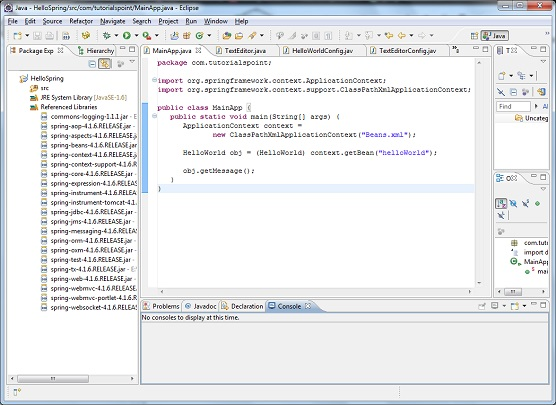
}Here's what the second file, MainApp.java content:
package com.tutorialspoint;
import org.springframework.context.ApplicationContext;
import org.springframework.context.support.ClassPathXmlApplicationContext;
public class MainApp {
   public static void main(String[] args) {
      ApplicationContext context =
             new ClassPathXmlApplicationContext("Beans.xml");
      HelloWorld obj = (HelloWorld) context.getBean("helloWorld");
      obj.getMessage();
   }
}
There are two main points to note about the main procedure:
-
The first step is to use the framework API ClassPathXmlAtionContext() to create the context of the application. This API loads the beans profile and ultimately is based on the provided API, which handles the creation and initialization of all objects, that is, the beans mentioned in the configuration file.
- The second step is to use the getBean() method of the context you have created to get the bean you want. T his method uses the ID of the bean to return a generic object that can eventually be converted to an actual object. Once you have an object, you can use it to call methods of any class.
Step 4: Create a profile for the bean
You need to create a bean profile that is an XML file and is classed as the glue that glues the bean. This file needs to be created in the src directory, as shown in the following image:
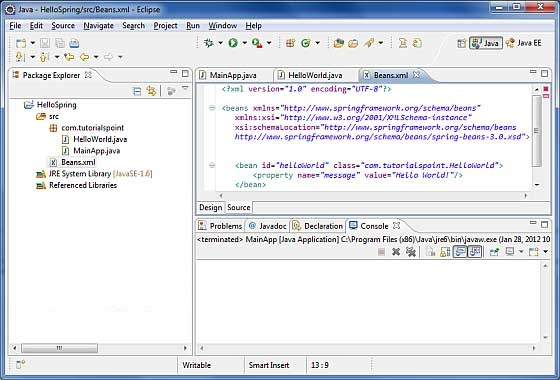
Usually developers save the file with the name Beans.xml file, but you can also set it to any name you like. However, you must make sure that the file is available in CLASSPATH and use the same name in the main application, while creating the context .java application in the MainApp file.
Beans .xml is used to assign unique IDs to different beans and to control the creation of objects with different values without affecting any of Spring's source files. F or example, with the following file, you can pass any value for the "message" variable, so you can output different values of information without affecting the HelloWorld.java and MainApp .java files. Let's see how it works:
<?xml version="1.0" encoding="UTF-8"?>

<beans xmlns="http://www.springframework.org/schema/beans"
    xmlns:xsi="http://www.w3.org/2001/XMLSchema-instance"
    xsi:schemaLocation="http://www.springframework.org/schema/beans
    http://www.springframework.org/schema/beans/spring-beans-3.0.xsd">

   <bean id="helloWorld" class="com.tutorialspoint.HelloWorld">
       <property name="message" value="Hello World!"/>
   </bean>

</beans>
When spring applications are loaded into memory, the framework uses the above profile to create all defined beans and assigns them a unique ID as defined by the label. You can use labels to pass values that use different variables when creating objects.
Step 5: Run the program
Once you're done creating the source code and bean profile, you're ready to compile and run your program. T o do this, keep the MainApp.Java file tag valid and use the available Run option in the Eclipse IDE, or compile and run your application MainApp using Ctrl and F11. If your application is all right, the following information will be printed in the Eclipse IDE console:
Your Message : Hello World!Congratulations, you've successfully created your first Spring app. Y ou can see the flexibility of the Spring application above by changing the value of the "message" property and keeping the two source files unchanged. Next, let's start doing something more interesting in the next few chapters.