JSP file upload
May 12, 2021 JSP
Table of contents
JSP can upload files to the server via HTML form forms. The file type can be a text file, a binary file, an image file, and any other document.
Create a file upload form
Next, we use HTML tags to create file upload forms, with the following points to note:
- The form method property must be set to the POST method and the GET method cannot be used.
- The form form enctype property needs to be set to multipart/form-data.
- The form form action property needs to be set to the jsp file address submitted to the background processing file upload. For example, uploadFile .jsp program files are used to process uploaded files.
- Uploading a file element requires the use of a label with a property set to type -"file". If you need to upload more than one file, you can set a different name in the .lt;input .../gt; label.
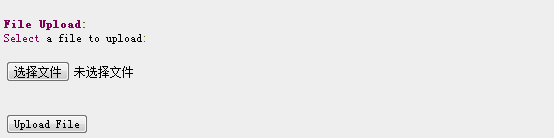
Here's a form for uploading files, as follows:
<html>
<head>
<title>File Uploading Form</title>
</head>
<body>
<h3>File Upload:</h3>
Select a file to upload: <br />
<form action="UploadServlet" method="post"
                        enctype="multipart/form-data">
<input type="file" name="file" size="50" />
<br />
<input type="submit" value="Upload File" />
</form>
</body>
</html>
Accessing the file in your local browser, the display screen looks like this, and when you click upload File a window pops up to let you choose which file to upload:
Background JSP processing scripts
First we define the location where the file is uploaded and stored on the service, you can write the path in your program, or we can set up the directory of the file store by setting the context-param element in the web .xml profile, as follows:
<web-app>
....
<context-param>
    <description>文件上传地址</description>
    <param-name>file-upload</param-name>
    <param-value>
         c:\apache-tomcat-5.5.29\webapps\data\
     </param-value>
</context-param>
....
</web-app>
The following script file, UploadFile.jsp can handle multiple uploaded files, and we need to be aware of the following before using the script:
- The following examples rely on FileUpload, so you need to introduce the latest commons-fileupload.x.x-package files .jar your classpath. The download address is: http://commons.apache.org/fileupload/.
- FileUpload relies on Commons IO, so you'll need to introduce the latest commons-io-x.x .jar. The download address is: http://commons.apache.org/io/.
- When testing the following instances, you need to upload a file that confirms that the uploaded file size is smaller than the size set by the maxFileSize variable, otherwise the file cannot be uploaded successfully.
- Make sure that you've created directories c:?temp and c:?apache-tomcat-5.5.29?webapps\data.
<%@ page import="java.io.*,java.util.*, javax.servlet.*" %>
<%@ page import="javax.servlet.http.*" %>
<%@ page import="org.apache.commons.fileupload.*" %>
<%@ page import="org.apache.commons.fileupload.disk.*" %>
<%@ page import="org.apache.commons.fileupload.servlet.*" %>
<%@ page import="org.apache.commons.io.output.*" %>
<%
File file ;
int maxFileSize = 5000 * 1024;
int maxMemSize = 5000 * 1024;
ServletContext context = pageContext.getServletContext();
String filePath = context.getInitParameter("file-upload");
// 验证上传内容了类型
String contentType = request.getContentType();
if ((contentType.indexOf("multipart/form-data") >= 0)) {
DiskFileItemFactory factory = new DiskFileItemFactory();
// 设置内存中存储文件的最大值
factory.setSizeThreshold(maxMemSize);
// 本地存储的数据大于 maxMemSize.
factory.setRepository(new File("c:\\temp"));
// 创建一个新的文件上传处理程序
ServletFileUpload upload = new ServletFileUpload(factory);
// 设置最大上传的文件大小
upload.setSizeMax( maxFileSize );
try{
// 解析获取的文件
List fileItems = upload.parseRequest(request);
// 处理上传的文件
Iterator i = fileItems.iterator();
out.println("<html>");
out.println("<head>");
out.println("<title>JSP File upload</title>");
out.println("</head>");
out.println("<body>");
while ( i.hasNext () )
{
FileItem fi = (FileItem)i.next();
if ( !fi.isFormField () )
{
// 获取上传文件的参数
String fieldName = fi.getFieldName();
String fileName = fi.getName();
boolean isInMemory = fi.isInMemory();
long sizeInBytes = fi.getSize();
// 写入文件
if( fileName.lastIndexOf("\\") >= 0 ){
file = new File( filePath ,
fileName.substring( fileName.lastIndexOf("\\"))) ;
}else{
file = new File( filePath ,
fileName.substring(fileName.lastIndexOf("\\")+1)) ;
}
fi.write( file ) ;
out.println("Uploaded Filename: " + filePath +
fileName + "<br>");
}
}
out.println("</body>");
out.println("</html>");
}catch(Exception ex) {
System.out.println(ex);
}
}else{
out.println("<html>");
out.println("<head>");
out.println("<title>Servlet upload</title>");
out.println("</head>");
out.println("<body>");
out.println("<p>No file uploaded</p>");
out.println("</body>");
out.println("</html>");
}
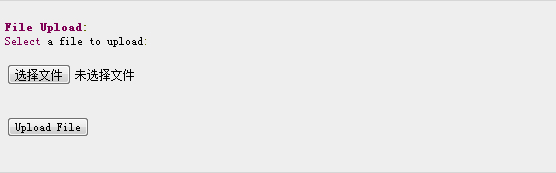
%>Let's then access the http://localhost:8080/UploadFile.htm browser, the interface looks like this, and upload the file: