Cordova file transfer
May 21, 2021 Cordova
Table of contents
This plug-in is used to upload and download files.
Step 1 - Install the file transfer plug-in
We need to open the command prompt and run the following command to install the plug-in.
C:\Users\username\Desktop\CordovaProject>cordova plugin add cordova-plugin-file-transfer
Step 2 - Create a button
In this chapter, we'll show you how to upload and download files. /b10> Let's .html two buttons in the index file.
<button id = "uploadFile">UPLOAD</button>
<button id = "downloadFile">DOWNLOAD</button>
Step 3 - Add an event listener
The event listener will be created in the index .js onDeviceReady function. We are adding click events and callback functions.
document.getElementById("uploadFile").addEventListener("click", uploadFile);
document.getElementById("downloadFile").addEventListener("click", downloadFile);
Step 4A - Download feature
This feature will be used to download files from the server to the device. /b10> We've uploaded your postimage.org to make it easier. /b11> You may want to use your own server. /b12> The function is placed .js index and triggers when the appropriate button is pressed. /b13> uri is the server download link, fileURI is the path to the DCIM folder on our device.
function downloadFile() {

   var fileTransfer = new FileTransfer();
   var uri = encodeURI("http://s14.postimg.org/i8qvaxyup/bitcoin1.jpg");
   var fileURL =  "///storage/emulated/0/DCIM/myFile";

   fileTransfer.download(
      uri, fileURL, function(entry) {
         console.log("download complete: " + entry.toURL());
      },

      function(error) {
         console.log("download error source " + error.source);
         console.log("download error target " + error.target);
         console.log("download error code" + error.code);
      },

      false, {
         headers: {
            "Authorization": "Basic dGVzdHVzZXJuYW1lOnRlc3RwYXNzd29yZA=="
         }
      }
   );
}
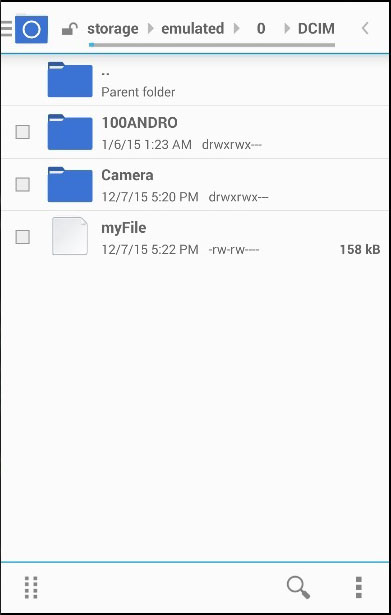
Once the Download button is pressed, the file will be downloaded from postimg.org server to our mobile device. /b10> We can check the specified folder to see if myFile exists.
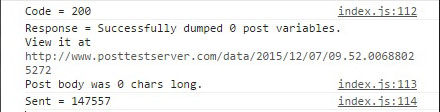
The console output looks like this -

Step 4B - Upload function
Now let's create a function that uploads the file to the server. /b10> Again, we want to simplify the process as much as possible, so we'll posttestserver.com using the online server. /b11> The uri value will be linked to the posttestserver published.
function uploadFile() {
   var fileURL = "///storage/emulated/0/DCIM/myFile"
   var uri = encodeURI("http://posttestserver.com/post.php");
   var options = new FileUploadOptions();

   options.fileKey = "file";
   options.fileName = fileURL.substr(fileURL.lastIndexOf('/')+1);
   options.mimeType = "text/plain";

   var headers = {'headerParam':'headerValue'};
   options.headers = headers;

   var ft = new FileTransfer();

   ft.upload(fileURL, uri, onSuccess, onError, options);

   function onSuccess(r) {
      console.log("Code = " + r.responseCode);
      console.log("Response = " + r.response);
      console.log("Sent = " + r.bytesSent);
   }

   function onError(error) {
      alert("An error has occurred: Code = " + error.code);
      console.log("upload error source " + error.source);
      console.log("upload error target " + error.target);
   }

}
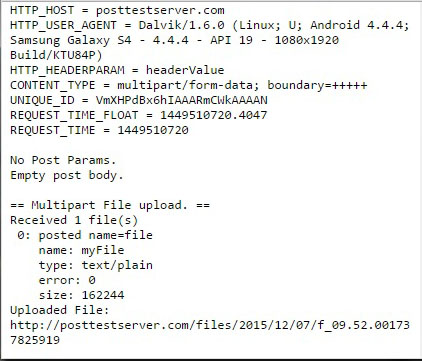
Now we can press the Upload button to trigger this feature. /b10> We will get the console output to confirm that the upload was successful.
Now we can press the Upload button to trigger this feature. /b10> We will get the console output to confirm that the upload was successful. ...