WordPress discusses settings
May 15, 2021 WordPress
In this chapter, we'll look at Discussion settings in WordPress. /b10> WordPress discussion settings can be defined as interactions between bloggers and visitors. /b11> These settings are done by the administrator to control posts/pages that are accessed through the user.
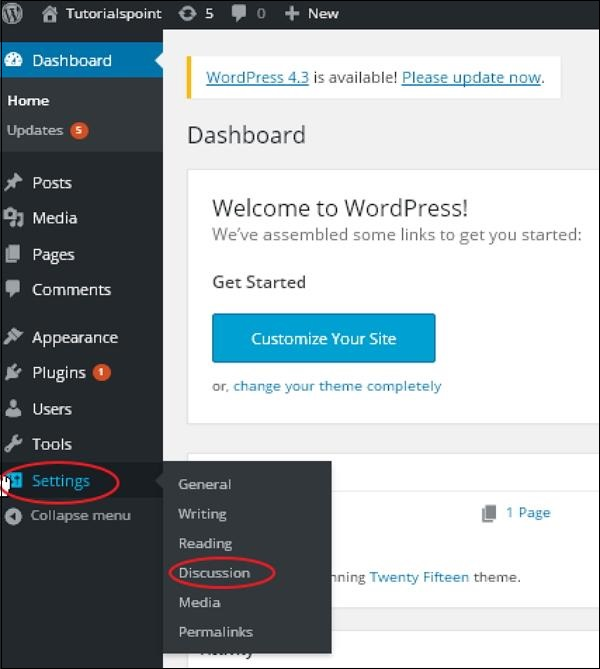
Here are the steps to access the Discussion settings:
Step (1) - Click Settings in WordPress to → Discussion option.
Step (2) - Displays the discussion settings page, as shown in the following snapshot.
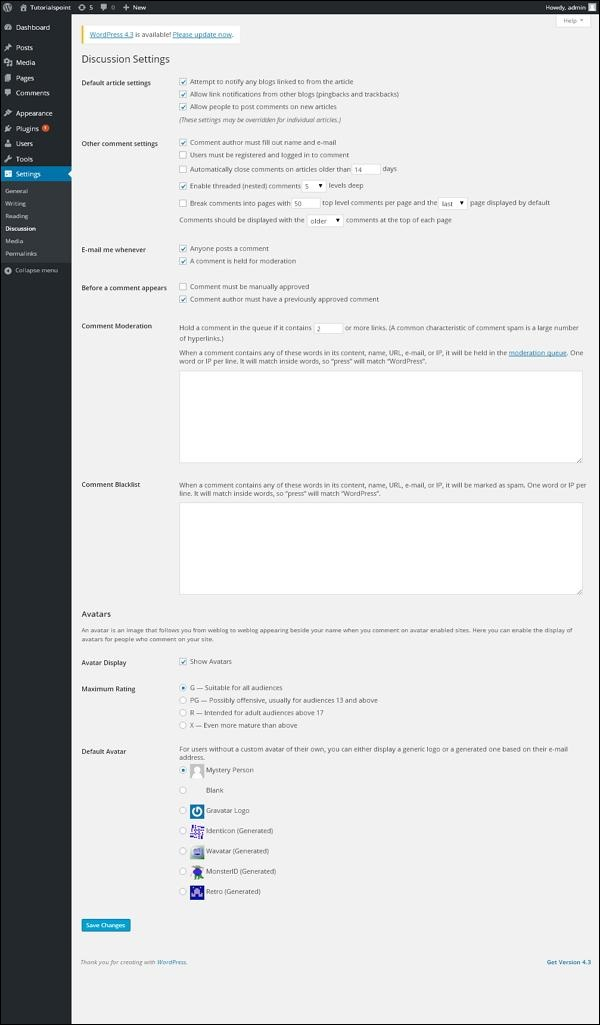
The following fields can be seen in the discussion settings.
-
Default article settings ( article settings) - These settings default to new pages or new information that you create for you. /b10> This contains three other settings. They are --
-
Try notifying any blog linked to an article - when you post an article, it sends a notification (send ping and trackback) to another blog.
-
Allow link notifications from other blogs (pingbacks and trackbacks) - accept pings from other blogs.
-
Allow others to post comments on new articles - You can allow or prohibit others from using this setting to comment on your article.
You can change the settings as you wish for your personal article.
-
-
Other Comment Settings ( comment settings) - This setting has the following options -
-
Comment authors must fill in their names and emails - when you check this box, you must fill in your name and email address.
-
Users must register and sign in to comment - if you select this check box, only those registered visitors can comment, and if not, anyone can leave any comments.
-
Auto-close comments for articles before the date - This option allows you to accept comments for a specific time period only if you wish.
-
Enable lead (nested) comments - When you select this option, visitors can reply or discuss and get a reply.
-
Divide comments into top-level comment pages per page and the default display page - If your page receives a lot of comments, you can divide them into different pages by checking this box.
-
Comments should appear with the comments at the top of each page - you can arrange the comments in ascending or descending order.
-
-
Email me whenever (email me) - This setting contains two options, namely -
-
Anyone commenting - When you check this box, the author receives an email for each posted comment.
-
Hold comments for review - This is used to prevent your comments from being updated before an administrator reviews them.
-
-
Before a comment sees (before commenting) - This setting allows you to control the post. There are two other settings:
-
Comment must be manually approved (comments ( manually approved) - If this box is checked, only comments approved by an administrator can appear on a post or page.
-
Comment author must have a previously approved comment (comment author must have previously approved comments) - You can check when you want to approve comments from an author who has commented and his email address matches the email address of a previously published comment. /b11> Otherwise, the review will remain reviewed.
-
-
Comment Moderation - Contains only a specific number of links that allow access to reviews.
-
Comment Blacklist ( can enter your own spam, you don't want visitors to enter comments, URLs, emails, etc.; /b10> It filters comments later.
-
Avatars - The avatar is a small picture that appears in the upper right corner of the information center screen next to your name. /b10> It's like your profile picture. /b11> Here are a few options where you can set up your profile picture on the WordPress website.
-
Avatar Display - When elected, it displays your avatar instead of your name.
-
Highest rating - You have four other options available for avatars. /b10> They are G, PG, R and X. This is the age section and you can choose based on the type of audience you want to show your posts.
-
Default Avatar - In this option, there are several types of avatars with images; /b10> You can keep these avatars based on your visitor's email address.
-
Step (3) - Click the Save Changes button to save the changes.