WordPress plug-in customization
May 15, 2021 WordPress
In this chapter, we'll learn how to customize plug-ins in WordPress without having to write any HTML or CSS. /b10> It is usually a big extra addition to a multi-user site. /b11> This new approach lets you use wordPress theme customization tools (no coding techniques required) to self-order your landing page.
Here are some simple steps to customize your plug-in in WordPress.
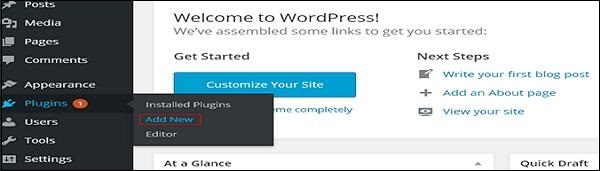
Step (1) - Click Plugins → Add New.
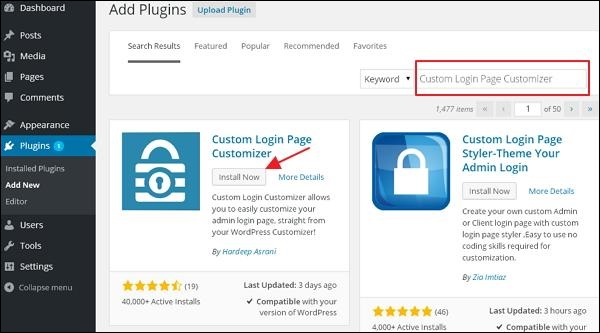
Step (2) - Install and activate the Custom Login Page Custom Program plug-in.
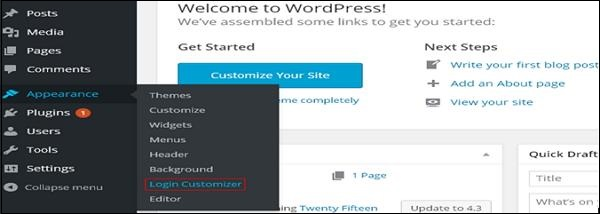
Step (3) - Click on the → The Customize Login section.
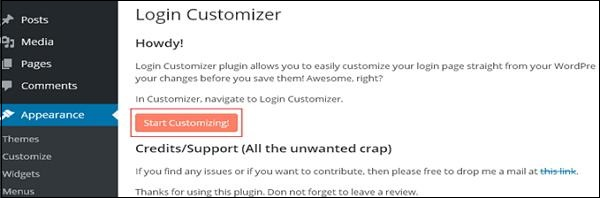
Step (4) - Click the Start Customizing button to continue.
Step (5) - It will launch the built-in WordPress theme customizer. /b10> You can customize the theme and make it look the way you want.
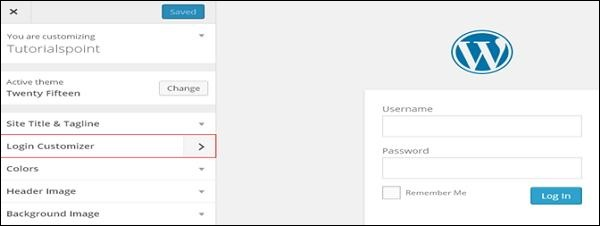
Click on the new Login Custom Tools tab on the side panel. /b10> The sign-in custom program page is displayed. /b11> On the sign-in custom program page, you can customize the sign-in page as you would a custom WordPress theme.
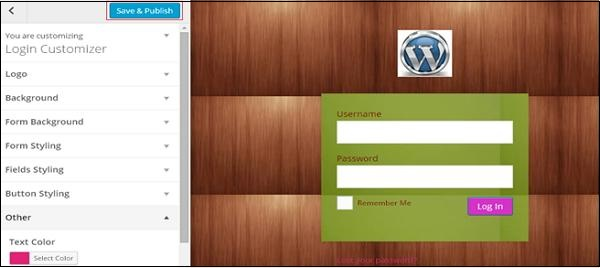
Step (6) - The custom login page will appear as follows.
-
Logo - Upload the logo of your choice to replace the default WordPress logo.
-
Background - Add a background picture, or you can choose the background color of your choice.
-
Form Background - Select the form background picture or color for the sign-in form container you choose.
Most of the choices in the custom program panel are transparent. /b10> You can check all the options in your custom program to adjust the settings to the requirements of the sign-in page. /b11> Click the Save and Publish button.