WordPress backup and recovery
May 15, 2021 WordPress
Table of contents
In this chapter, we'll look at how Backup and Restore recover files and databases in WordPress. WordPress has a two-part backup, such as
- WordPress Files Backup
- WordPress Database Backup
- WordPress Files Restore
- WordPress Database Restore
WordPress file backup
To get a backup file for WordPress, you need to install FileZilla Client on your system.
Here are the easy steps for file backup operations in WordPress -
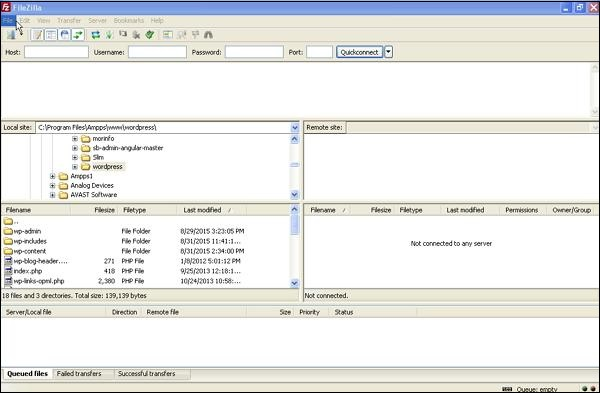
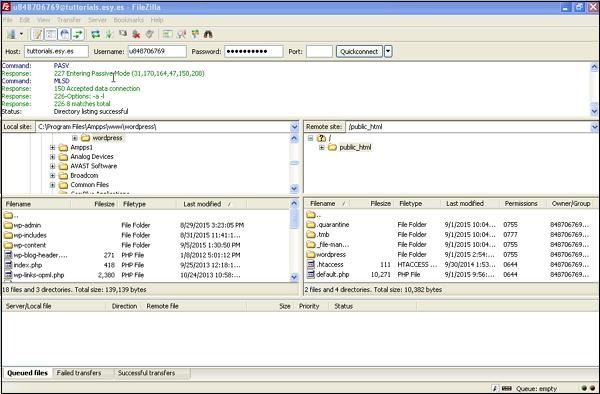
Step (1) - Open the FileZilla client, as shown in the screenshot below.
Step (2) - Enter the host, username, password, and port that you used to log on to cPanel.
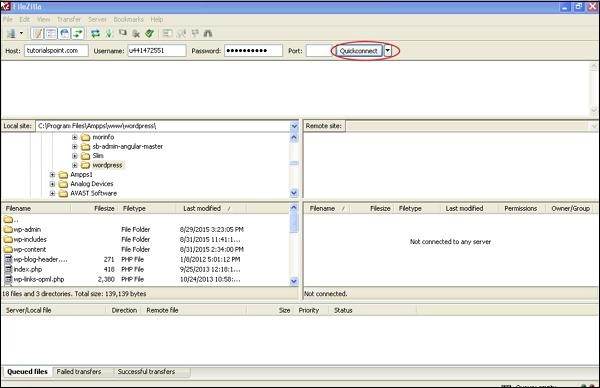
Once you have filled in all the fields, click the Quickconnect button.
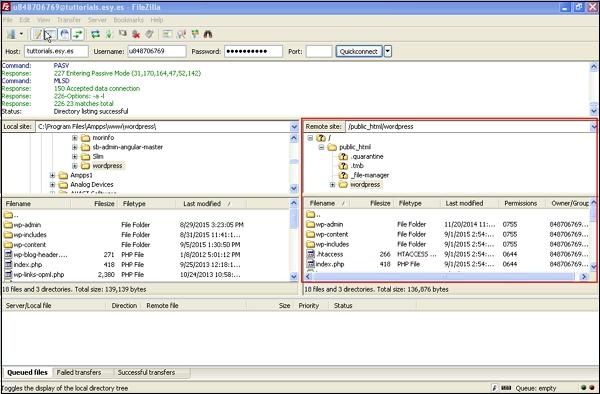
Step (3) - You'll see all the files and folders on the WordPress website on the right, as shown on the screen below.
Step (4) - Select all files and folders, right-click the mouse, and then click Download.
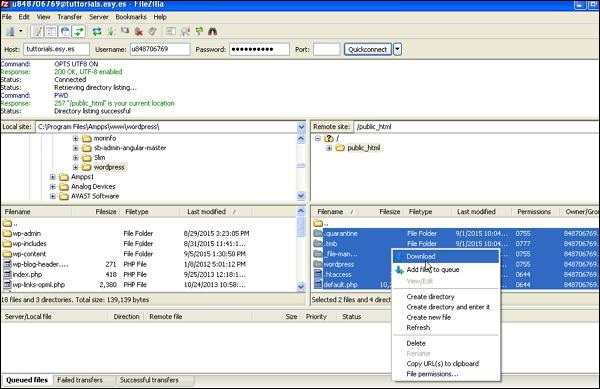
After downloading the WordPress file from cPanel, it will be saved on your system.
WordPress database backup
Here are the easy steps to back up your database in WordPress -
Step (1) - Enter the path in the browser http:// localhost / phpmyadmin. /b10> You'll get the following screen.
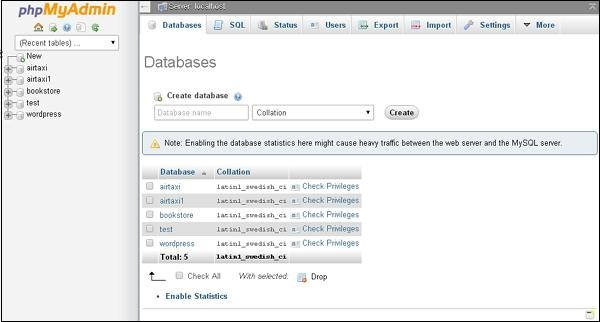
Step (2) - Click on the database name "wordpress" that you created for WordPress.

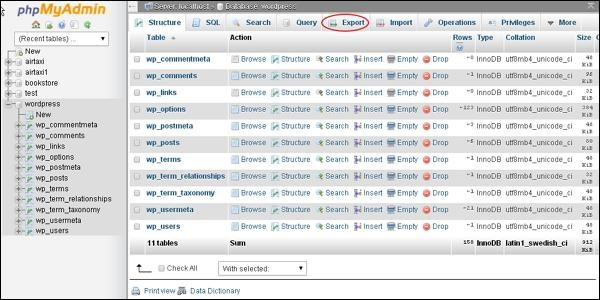
Step (3) - When you click on the database wordpress, the following page opens. /b10> Click on the Export tab.
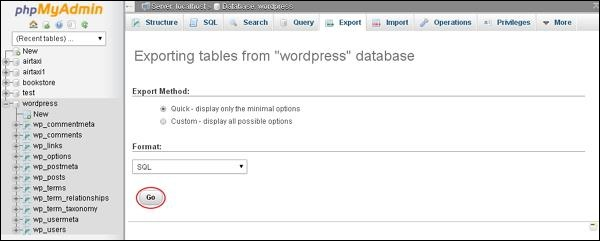
Step (4) - You'll get two ways to export the database, Fast and Custom. /b10> Select either method, and then click the Go button.
After you export the database file, it will be saved on your system.
Restore your WordPress file
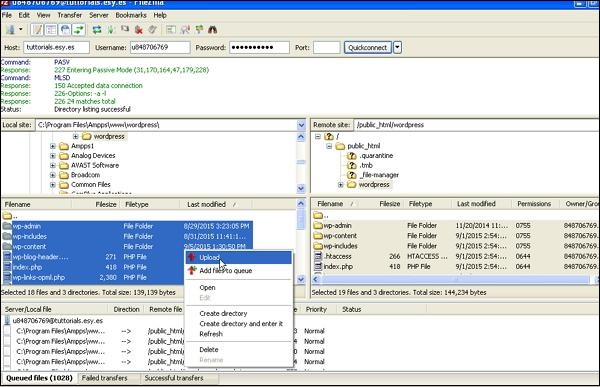
Here are the easy steps to recover files in WordPress using ftp -
Step (1) - Open FileZilla Client and log on to your website using ftp, as shown on the screen below.
Step (2) - Open the local directory in ftp and upload all WordPress files to your website, as shown below.
Step (3) - Then, find your wordpress folder → wp-config .php file. Copy and rename the wp-config .php before editing, and if there are some errors, you can recover the file.
Open the wp-config .php file and find the following code.
define('DB_NAME', 'db_name');
Replace db_name the name of the database you created.
define('DB_USER', 'db_user');
Replace the phone with your username MySql db_user.
define('DB_PASSWORD', 'db_password');
Replace your password MySql with db_password.
Edit and save your wp profile and upload it to your WordPress website via ftp.
Restore the WordPress database
Here are the steps to restore your database in WordPress -
Step (1) - Enter the path in the browser http:// localhost / phpmyadmin. /b10> The following screen will pop up.
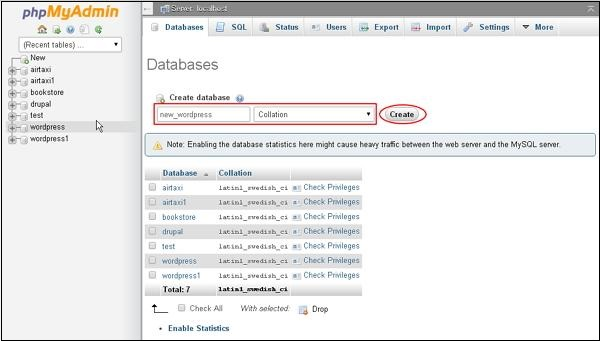
You can create a new database or import backups from an existing database.
Here, we'll create a new database name, new_wordpress, and then click new_wordpress button.
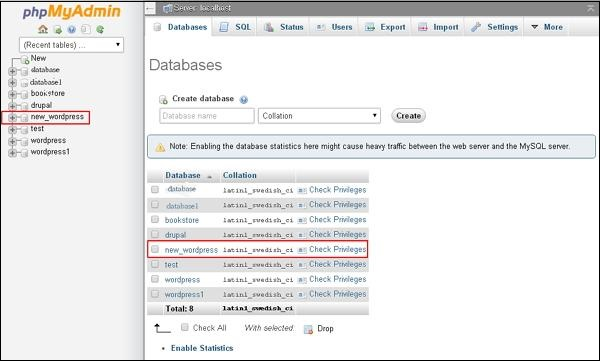
Step (2) - You can view the database you created, as shown on the screen below. /b10> Click on the database name new_wordpress.
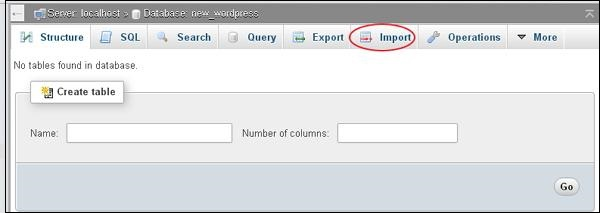
Step (3) - Click Import.
Step (4) - Click the Select File button to select a backup file from the system. /b10> After uploading the sql file, select the format SQL, as shown on the screen below.
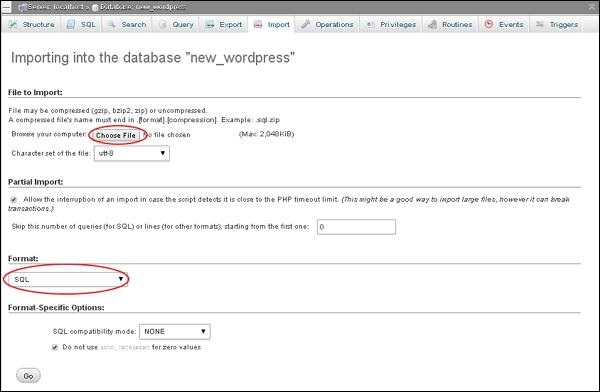
Click the Go button.
Step (5) - Once you click Go, you will receive a message after the sql file upload is successful.
