WeChat gadgets develop plug-ins
May 17, 2021 WeChat Mini Program Development Document
Table of contents
2. Plug-in directory structure
5. Preview, upload, and publish
6. Test in a development version of the program
Develop plug-ins
Before developing plug-ins, read the "Little Program Plug-in Access Guide" to understand the opening process and open scope, and open plug-in functions. If the plug-in feature is not enabled, the plug-in will not be uploaded.
Create a plug-in project
Plug-in-type projects can be created directly in developer tools.
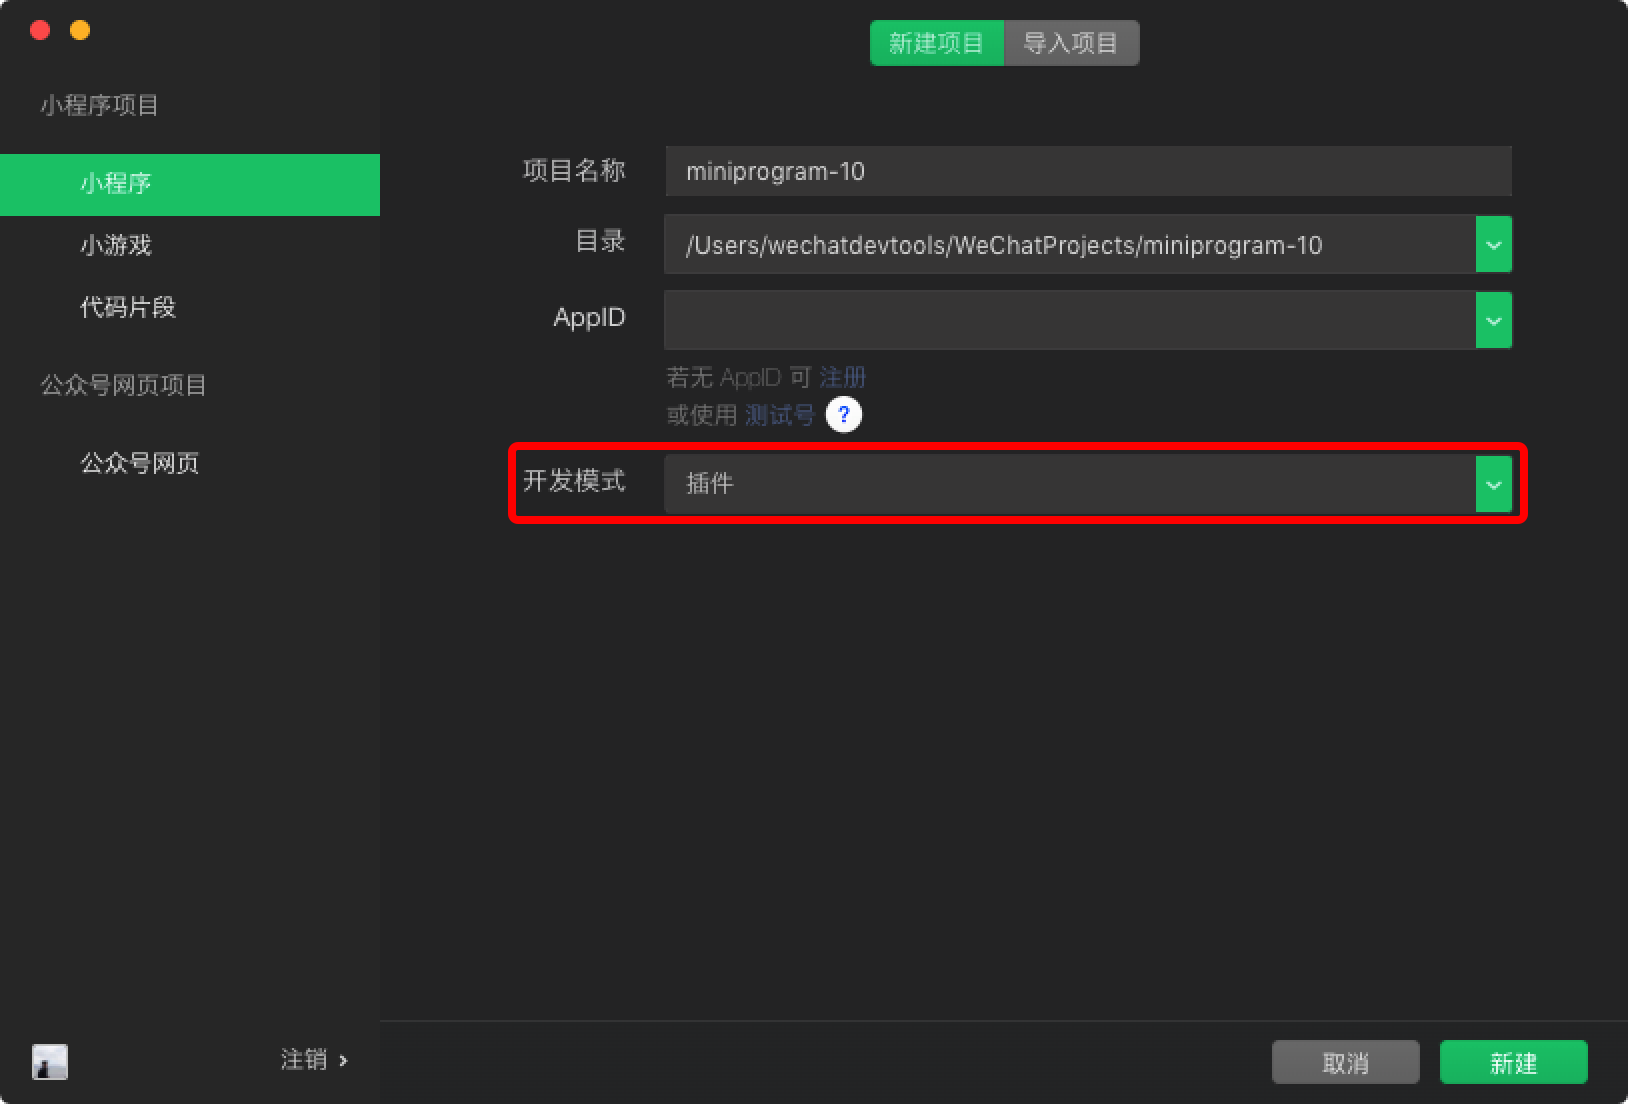
After you create a new plug-in type project, if you create a sample project, the project will contain three directories:
- Plugin directory: Plugin code directory.
- miniprogram directory: Place a small program for debugging plug-ins.
- Doc directory: Used to place plug-in development documents.
The miniprogram directory content can be written as a normal mini-program for plug-in debugging, previewing, and auditing. The following focuses on plug-in code in plugin and plug-in development documentation in doc.
We provide a complete plug-in example that can be viewed directly in The WeChat Developer Tool, which developers can compare to this article to understand. Please note:
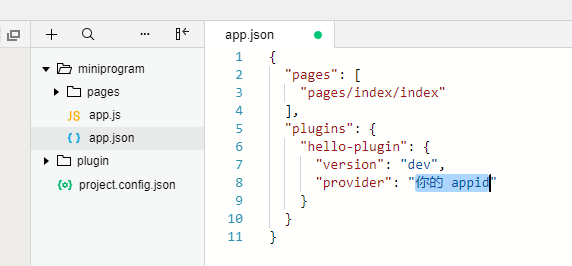
- Since the plug-in requires an appid to work, fill in an appid;
- Because of the limitations of the current snippet, when you open the sample, manually fill in the appid into miniprogram/app.json (see below) to make the sample work.
Plug-in directory structure
A plug-in can contain several custom components, pages, and a set of js interfaces. The directory content of the plug-in is as follows:
plugin
├── components
│   ├── hello-component.js   // 插件提供的自定义组件(可以有多个)
│   ├── hello-component.json
│   ├── hello-component.wxml
│   └── hello-component.wxss
├── pages
│   ├── hello-page.js        // 插件提供的页面(可以有多个,自小程序基础库版本 2.1.0 开始支持)
│   ├── hello-page.json
│   ├── hello-page.wxml
│   └── hello-page.wxss
├── index.js                 // 插件的 js 接口
└── plugin.json              // 插件配置文件
Plug-in profile
All custom components, pages, and js interfaces open to consumer gadgets must be listed in the plug-in profile plugin.json in the following format:
Code example:
{
  "publicComponents": {
    "hello-component": "components/hello-component"
  },
  "pages": {
    "hello-page": "pages/hello-page"
  },
  "main": "index.js"
}
This profile opens a custom component hello-component, a page hello-page, and index.js all js interfaces exported under the consumer gadget.
Plug-in development
Note: In plug-in development, only some interfaces can be called directly, and some capabilities, such as getting user information and initiating payments, can be used as plug-in feature pages.
Custom components
A plug-in can define several custom components that can refer to each other within a plug-in. However, custom components that are available to consumer gadgets must be listed in the publicComponents segment of the profile (see above).
With the exception of interface limitations, custom components are written and organized in the same way as normal custom components, each consisting of four files: wxml, wxss, js, and json. You can refer specifically to the documentation for the custom component.
Page
The plug-in supports the page starting with the small program base library version 2.1.0. A plug-in can define several plug-in pages that can jump from a custom component of the plug-in, from other pages, or from a consumer program. All pages must be listed in the pages section of the profile (see above).
In addition to interface restrictions, plug-ins are written and organized in the same way as normal pages, each consisting of four files: wxml, wxss, js, and json. You can refer to other documentation about the page.
The navigator component can be used when the plug-in performs a page jump. W hen the plug-in jumps to its own page, url should be set to the form of plugin-private/PLUGIN_APPID/PATH/TO/PAGE. You can also set url this way when you need to jump to another plug-in.
Code example:
<navigator url="plugin-private://wxidxxxxxxxxxxxxxx/pages/hello-page">
  Go to pages/hello-page!
</navigator>
Starting with the underlying library version 2.2.2, in the plug-in's own page, the plug-in can also call wx.navigateTo for page jumps in a url format similar to that used with the navigator component.
Interface
Plug-ins can export some js interfaces in the interface file (specified in the configuration file, see above for the consumer of the plug-in to call, such as:
Code example:
module.exports = {
  hello: function() {
    console.log('Hello plugin!')
  }
}
Get a small program export
Starting from the underlying library 2.11.1, the plug-in has the global function requireMiniProgram to get content exported by the consumer applet.
For example, the consumer gadget does the following export:
// 使用者小程序
module.exports = {
  greeting() {
    return 'Greetings from Wechat MiniProgram!';
  }
}
So in the plug-in, you can get the content like this:
// 插件
const miniProgramExports = requireMiniProgram();
miniProgramExports.greeting(); // 'Greetings from Wechat MiniProgram!'
Preview, upload, and publish
Plug-ins can be previewed and uploaded like small programs, but the plug-ins do not have an experience version.
The plug-in will have multiple online versions at the same time, and the version number will be determined by the small program that uses the plug-in.
When your phone previews and admisses the plug-in, a special little program is used to preview the plug-in by using the small program under the miniprogram folder in the project.
- If the current developer has a test number, the test number is used, and the test number appid, appsecret, and the list of domain names can be seen on the test number's settings page.
- Otherwise, the Plug-in Development Assistant is used, which has a specific appid.
Test in a development version of the program
Typically, the code under miniprogram can be used as a small program code that uses plug-ins for debugging and testing.
Sometimes, however, the plug-in code needs to be debugged and tested in a small program that is actually running. A t this point, you can use the development version of the program to refer directly to the development version of the plug-in. Here's how:
- Upload the plug-in in the developer tool's plug-in project, at which point, the successful upload notification information will contain the plug-in development version ID (a random string of english and numbers) obtained by the upload;
- Click the notification button in the lower right corner of the developer tool to open the notification bar and see the newly generated ID;
- In any small program project that uses this plug-in, you can set the plug-in version to "version": "dev-"development ID", such as "version": "dev-abcdef0123456789abcdef0123456789";
- This will refer to the uploaded development version of the plug-in;
- Note that the ID may change when you upload the plug-in again.
If the development version of the small program refers to the development version of the plug-in, at this time the small program can not be uploaded and published. The plug-in version must be set to the official version before the small program can be uploaded and released normally.
Plug-in development documentation
Plug-in code is not visible when the consumer gadget uses the plug-in. T herefore, in addition to plug-in code, we also support plug-in developers to upload a plug-in development document. T his development document will be displayed on the plug-in details page for other developers to read and refer to as they browse and use plug-ins. Plug-in developers should provide the necessary description and explanation of the custom components, pages, interfaces, etc. provided by the plug-in in the plug-in development document, so that the user's small program can use the plug-in correctly.
The plug-in development document must be placed under the doc directory in the root of the plug-in project, which is structured as follows:
doc
├── README.md   // 插件文档,应为 markdown 格式
└── picture.jpg // 其他资源文件,仅支持图片
Among them, README.md the writing of the document has certain limitations, specifically:
- The referenced picture resource cannot be a network picture and must be placed in this directory;
- Links in the documentation can only be linked to: WeChat Developer Community (developers.weixin.qq.com) WeChat Public Platform (mp.weixin.qq.com) GitHub (github.com)
After README.md, you can right-click on the file bar of Explorer on the left side of the README.md and choose to upload the document. W hen you publish an uploaded document, the document is not published immediately. You can now use your account number and password to sign in to manage the background, preview and publish plug-in documents in the gadget plug-ins and basic settings.
Other considerations
Plug-ins call each other
Plug-ins cannot refer directly to other plug-ins. However, if a small program references multiple plug-ins, plug-ins can call each other.
The method by which one plug-in calls another plug-in is similar to the way the plug-in calls itself. You can use plugin-private://APPID to access custom components and pages of the plug-in (you can't use the plugin://).
For js interfaces, you can use requirePlugin, but you can't use requirePlugin at the beginning of the file, because the dependent plug-in may not have been initialized yet, consider calling requirePlugin at a later time, such as when the interface is actually called and when the component is attached. ( This issue will be fixed in the future.) )
The plug-in requests a signature
When a plug-in sends a network request using an API such as wx.request, it carries an additional signature HostSign to verify that the request originated from the widget plug-in. This signature is located in the request header and is shaped like:
X-WECHAT-HOSTSIGN: {"noncestr":"NONCESTR", "timestamp":"TIMESTAMP", "signature":"SIGNATURE"}
Where NONCESTR is a random string, TIMESTAMP is the UNIX timestamp that generates this random string and SIGNATURE. They are parameters used to calculate the signature SIGNATRUE, and the signature algorithm is:
SIGNATURE = sha1([APPID, NONCESTR, TIMESTAMP, TOKEN].sort().join(''))
Among them, the APPID is the AppId of the applet (available from the referrer at the request header), and the TOKEN is the plug-in Token, which can be found in the basic settings of the applet plug-in.
The referer format of the network request is fixed to https://servicewechat.com/(appid)/version/page-frame.html, where the appid is the appid of the applet, the version number is the version number of the applet, the version number is 0 for the development, the experience version, and the audit version, the version number is devtools for the developer tool, and the rest is the official version.
Plug-in developers can verify signatures on the server by following these steps:
- Sort represents the four values of APPID NONCESTR TIMESTAMP TOKEN as strings, sorted in dictionary order (with the sort method of the JavaScript array);
- join connects the four sequenced strings directly together;
- Use the sha1 algorithm for connection results, and the result is SIGNATURE.
Starting with base library version 2.0.7, NONCESTR and TIMESTAMP change every 10 minutes during the run of the sub-program if the network is healthy. If necessary, you can determine whether the current signature is still valid by determining timeSTAMP.