jQuery EasyUI Form - Create an asynchronous submission form
May 09, 2021 jQuery EasyUI
Table of contents
jQuery EasyUI Form - Create an asynchronous submission form
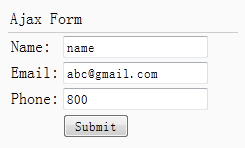
This section will show you how to submit a form through jQuery EasyUI. L et's create a form with name, email, and phone fields. C hange the form to a ajax form by using the EasyUI form plug-in. T he form submits all fields to the back server, which processes and sends some data back to the front page. We receive the return data and display it.
Create a form
	<div style="padding:3px 2px;border-bottom:1px solid #ccc">Ajax Form</div>
	<form id="ff" action="form1_proc.php" method="post">
		<table>
			<tr>
				<td>Name:</td>
				<td><input name="name" type="text"></input></td>
			</tr>
			<tr>
				<td>Email:</td>
				<td><input name="email" type="text"></input></td>
			</tr>
			<tr>
				<td>Phone:</td>
				<td><input name="phone" type="text"></input></td>
			</tr>
			<tr>
				<td></td>
				<td><input type="submit" value="Submit"></input></td>
			</tr>
		</table>
	</form>
Change to Ajax form
	$('#ff').form({
		success:function(data){
			$.messager.alert('Info', data, 'info');
		}
	});
Server-side code
form1_proc.php
	$name = $_POST['name'];
	$email = $_POST['email'];
	$phone = $_POST['phone'];

	echo "Your Name: $name <br/> Your Email: $email <br/> Your Phone: $phone";