jQuery EasyUI Drag and Drop - Create a school curriculum
May 08, 2021 jQuery EasyUI
Table of contents
jQuery EasyUI drag-and-drop - Create a school curriculum
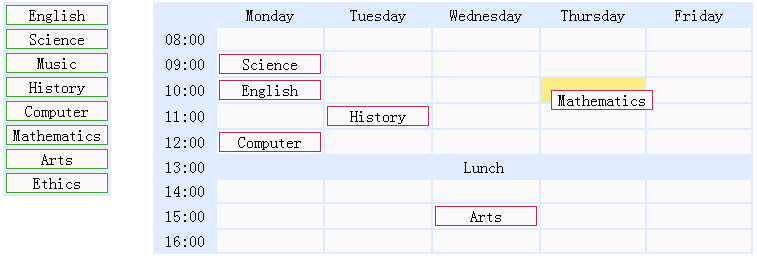
This section creates a school curriculum instance using jQuery EasyUI. I n this example, we'll create two tables: school subjects on the left and timesheets on the right. Y ou can drag the school subject and place it on the timesheet cell. T he school subject is a "item" element, and the timesheet cell is a "drop" element.
Show school subjects
	<div class="left">
		<table>
			<tr>
				<td><div class="item">English</div></td>
			</tr>
			<tr>
				<td><div class="item">Science</div></td>
			</tr>
			<!-- other subjects -->
		</table>
	</div>
Show the schedule
	<div class="right">
		<table>
			<tr>
				<td class="blank"></td>
				<td class="title">Monday</td>
				<td class="title">Tuesday</td>
				<td class="title">Wednesday</td>
				<td class="title">Thursday</td>
				<td class="title">Friday</td>
			</tr>
			<tr>
				<td class="time">08:00</td>
				<td class="drop"></td>
				<td class="drop"></td>
				<td class="drop"></td>
				<td class="drop"></td>
				<td class="drop"></td>
			</tr>
			<!-- other cells -->
		</table>
	</div>
Drag the school subject on the left
	$('.left .item').draggable({
		revert:true,
		proxy:'clone'
	});
Place the school subject on the timesheet cell
	$('.right td.drop').droppable({
		onDragEnter:function(){
			$(this).addClass('over');
		},
		onDragLeave:function(){
			$(this).removeClass('over');
		},
		onDrop:function(e,source){
			$(this).removeClass('over');
			if ($(source).hasClass('assigned')){
				$(this).append(source);
			} else {
				var c = $(source).clone().addClass('assigned');
				$(this).empty().append(c);
				c.draggable({
					revert:true
				});
			}
		}
	});
As you can see above, the onDrop callback function is called when the user drags the school subject on the left and places it in the timesheet cell. W e clone the source element dragged from the left and attach it to the timesheet cell. W hen you drag a school subject from one cell in the timesheet to another, simply move it.