Chrome Development Tools Save changes from your workspace
May 26, 2021 Chrome A guide to developing tools
Table of contents
Save changes through the workspace
Brief introduction
Chrome DevTools allows you to make changes to your page or CSS, and you can see how you've made them in real time. B ut what's more important to you if you need to copy changes in the external editor and paste them into DevTools? The workspace allows these changes to be stored temporarily on your hard drive without leaving the Chrome DevTools interface.
The workspace allows you to edit any type of source file in the Sources panel and save changes to your hard drive. A nd you can map resources from the local server to a file on disk, and when you modify the file and save it, they can run as usual. Also, if you set the mapping correctly, your modifications on the Elements panel are automatically stored on disk.
Put the project in the workspace
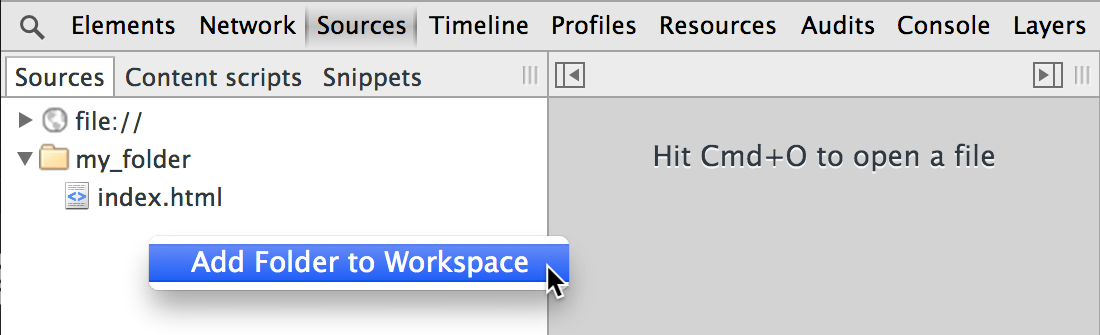
To edit your local source file in the Sources panel, right-click on the left side of the Sources panel and select Add Folder to Workspace. This starts a file selection box where you can select the folder you want to add to your workspace (this does not add the currently highlighted folder to your workspace).
When a yellow prompt appears at the top of Chrome, "DevTools requests full acess to .path to your folder", select . . .
In Chrome, you can edit any file and sub-folder under that folder. In this case, the "source file" is just HTML, CSS, and JavaScript, which refers to any type of file, including markdown and JSON.
Map network resources
What's really useful about a workspace is that it maps a local file to a URL (or network resource). W hen Chrome loads a mapped URL, the contents of the network folder are replaced by folders in the workspace. It's like these files are on the network, but you can modify the local files and save them through DevTools.
To map your site to your local workspace folder:
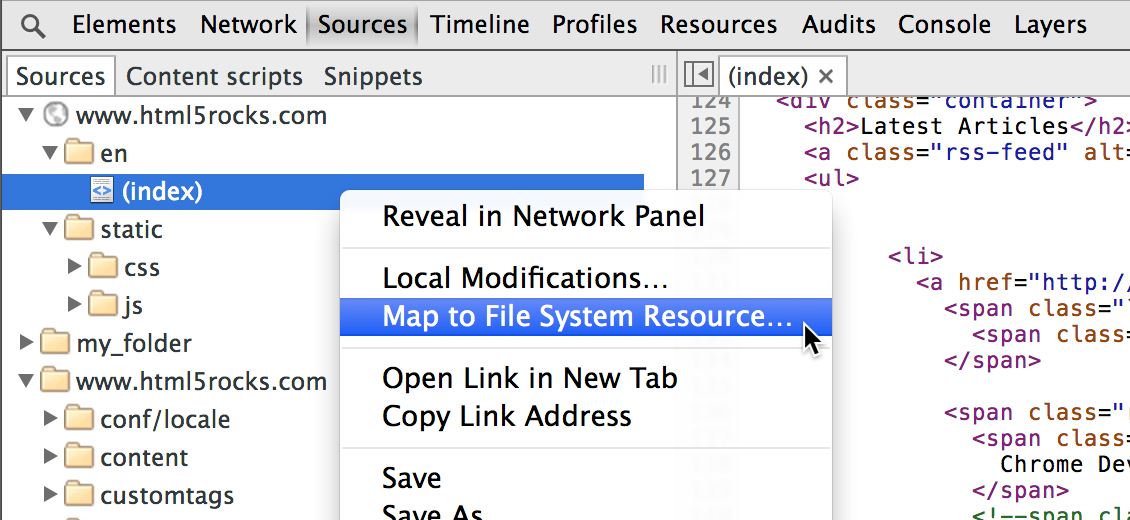
- In the Sources panel, right-click or hold Control and then click on the files on the site.
- Select Map to File System Resource.
- Select the appropriate file in the list that appears (you can enter the file name or keyword to find the file you want).
- Reload the page in Chrome.
Now the source panel will show the folder of the local workspace, not the contents of the server.
You can use this feature elsewhere, such as mapping workspace folders to URLs, or mapping network resources. N ote that not all network resources mapped locally are loaded into the browser, but your local files must be mapable to the URL. When you map a file in a workspace, you should map the file to most sites in that workspace.
Precautions
The workspace makes a lot of your work easier, and you don't need to switch between Chrome and the external editor. However, there are some things you need to note:
- Only styles that change in Elements are saved. Changes made to doM documents are not saved.
- The styles changed in the Elements panel are saved immediately, just as CSS files are mapped to local backup files (that is, changes originating from the Elements panel do not need to be saved manually).
- If you map files locally from a remote server, Chrome loads the files again from the remote server when you refresh the page. The changes you make are saved on your hard drive and take effect as you continue to edit files in your workspace.
File management for the workspace
When you use the workspace, you can add or delete files in the local directory in addition to editing existing ones.
Add a file
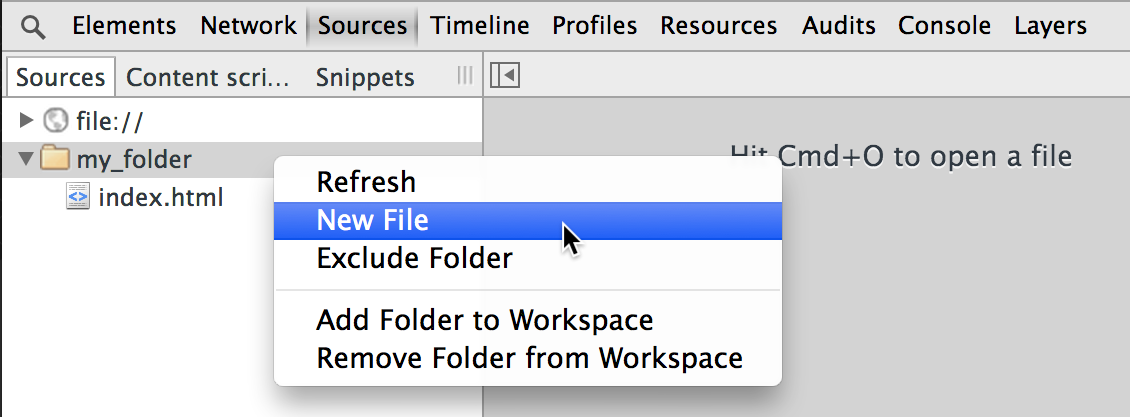
Right-click on the folder on the left and select New File.
Delete the file
Right-click on the file on the left and select Delete File.
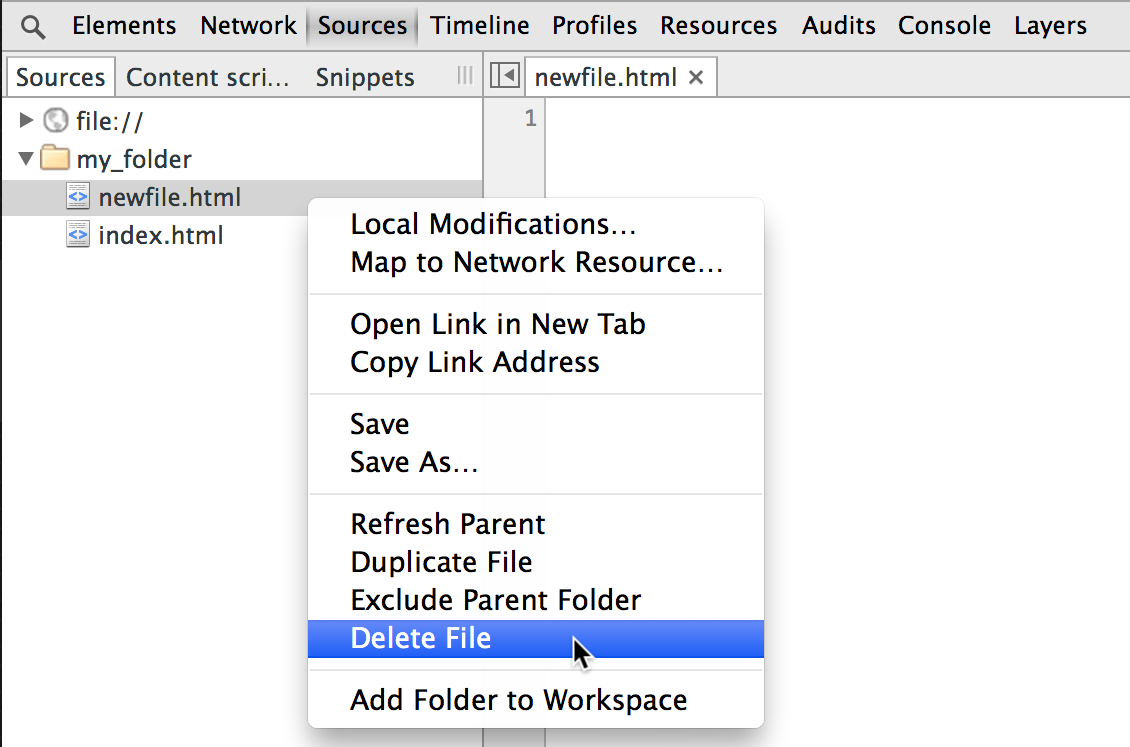
You can also select Duplicate File to copy the file. The new file appears in the Sources panel, and you can enter a new name for it (copy of mufile .txt by default).
Refresh
Now that you've created (deleted) files directly in your workspace, the source directory automatically refreshes and displays the new files. If it doesn't show up, you can right-click on a folder and select Refresh to refresh.
This method can help you refresh files in DevTools when you make changes and save them in another editor. In general, DevTools refresh automatically, even if the file is saved in an external editor, but if you need to recompile an HTML or CSS file, you need to refresh it manually.
Search for files
If you want to search for files in DevTools, press
Ctrl
plus
O
(or
Cmd
O
Mac) to open a file search option box.
You can do the same in the workspace, but in addition to searching for local files, it also searches for files that are loaded remotely in the workspace.
There are many ways to search for files, so you can search between files in your workspace and other files loaded into DevTools. You can even search through a string or a regular expression, and Chrome will find any file or page that matches.
To search for text through multiple files in a work interval:
- Press and hold the Esc key to open the console, and then select the Search tab next to the console to open the search window. Or open the search window by pressing Ctrl s Shift s F (using Cmd s Opt s F on your Mac).
- Enter what you want to search in the search box, and then press enter. If you're querying for a regular expression or case-sensitive content, check the box.

The workspace is a new feature of DevTools, so this article may not cover all of its features, please refer to the development documentation for details of the workspace.