Chrome Development Tool settings
May 26, 2021 Chrome A guide to developing tools
Table of contents
Settings
Modify the settings in DevTools
-
Click Set
 Gear to open the General Settings panel to make changes. A
lternatively, you can use shortcuts?
Open the Setting pane.
Gear to open the General Settings panel to make changes. A
lternatively, you can use shortcuts?
Open the Setting pane.
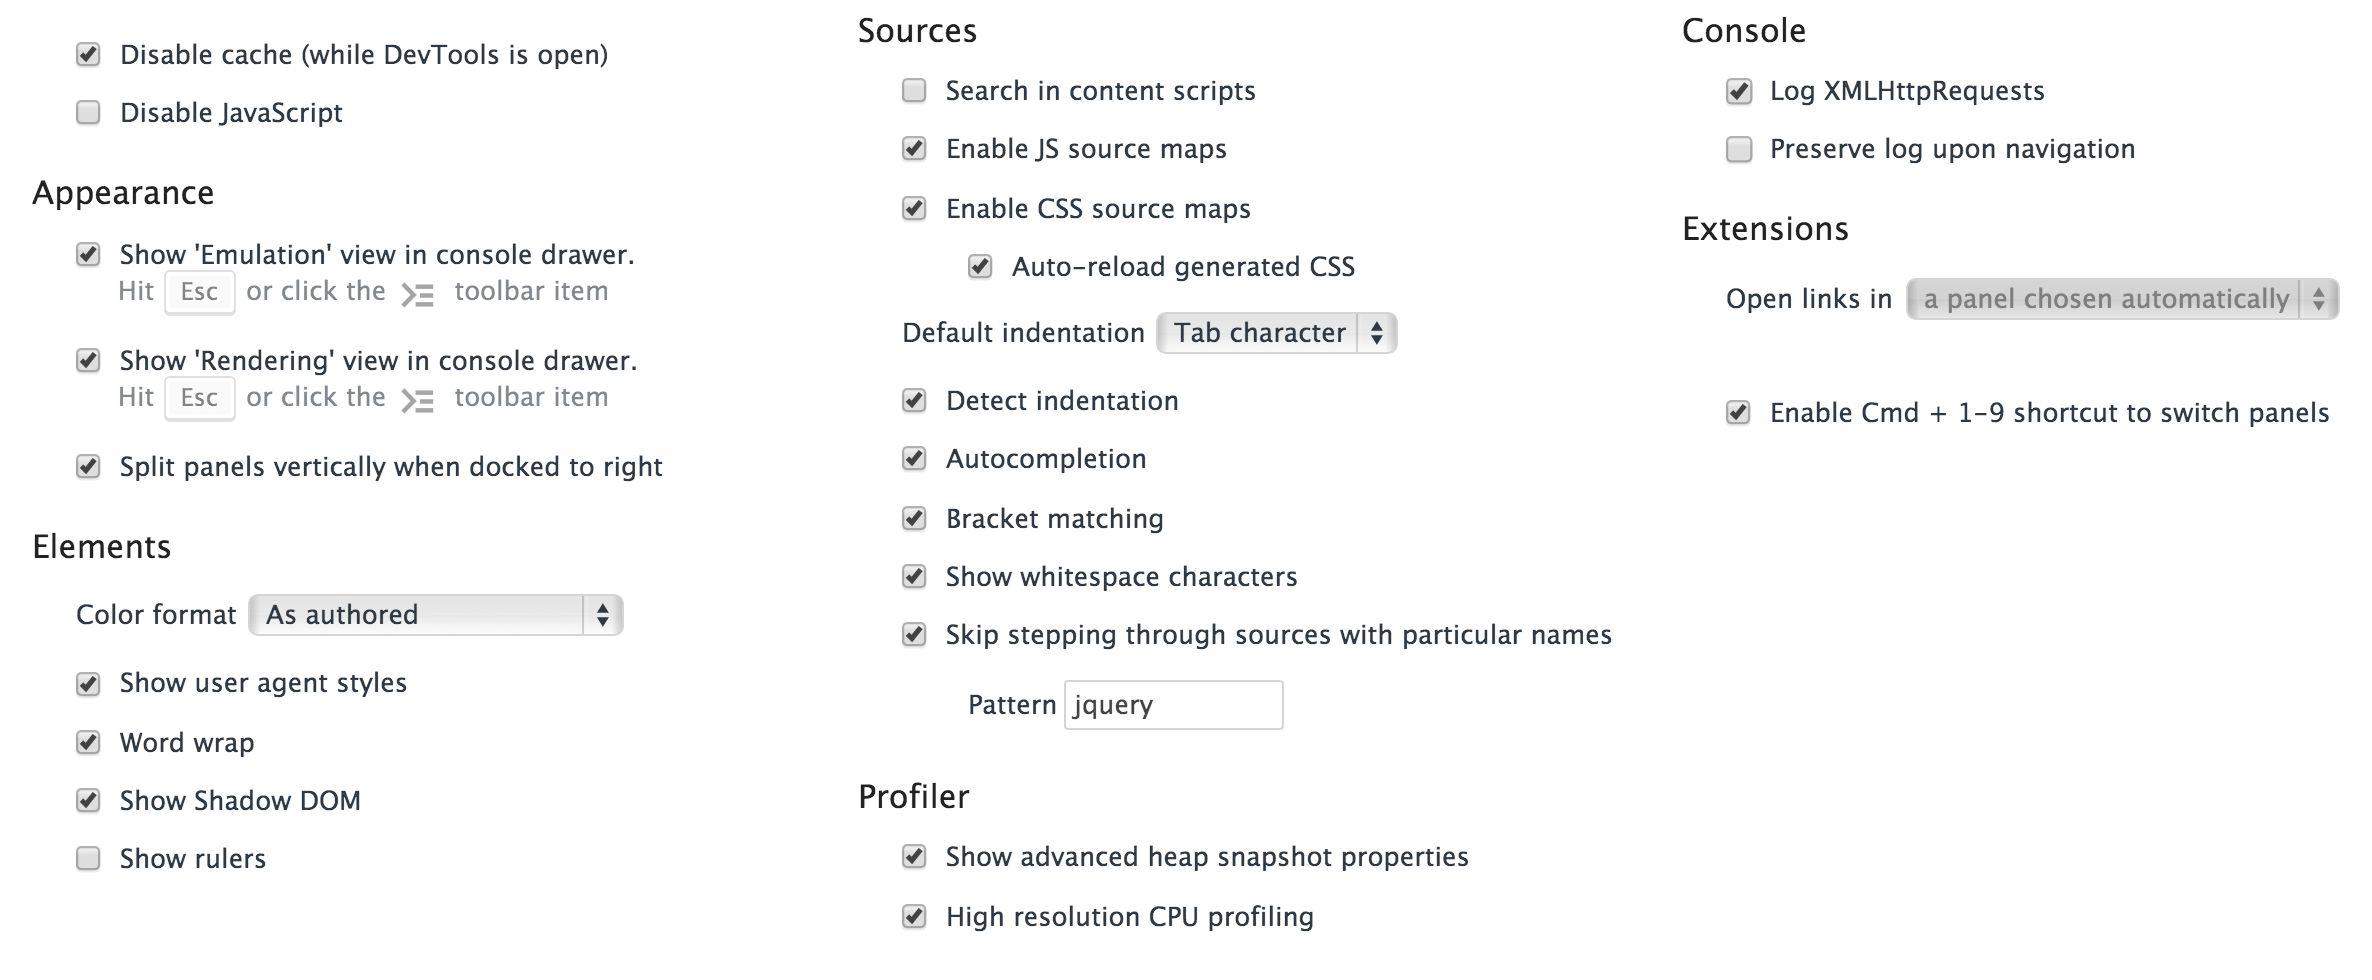
Universal settings
Disable the cache
Resource caching is prohibited only for pages that have DevTools open. If DevTools is turned off, it stops working.
Disable JavaScript
When you use this check, immediately pause all JavaScript code injected into the label with DevTools instances.
Note: The settings for both disabling caching and disabling JavaScript apply only if DevTools is open. When it is opened, devTools is on for the web page.
Switch panels using the Ctr plus 1-9 shortcuts
When more than nine tabs are open, labels 1-8 and 9 are the last tabs, and you can use ctrl plus 1-9 shortcuts to jump to the label specified in Chrome. This setting will allow DevTools to work in the same way, so you can quickly switch between panels.
Note: Enabling this may cause conflicts with shortcuts to other applications.
Interface (Appearance)
Split the panel vertically when it stops to the right
Using this changes the layout of the panel so that the main part is stacked at the top of the sidebar section. You will find it useful when their side-by-side side sidebars are small screens and there is not enough horizontal space.
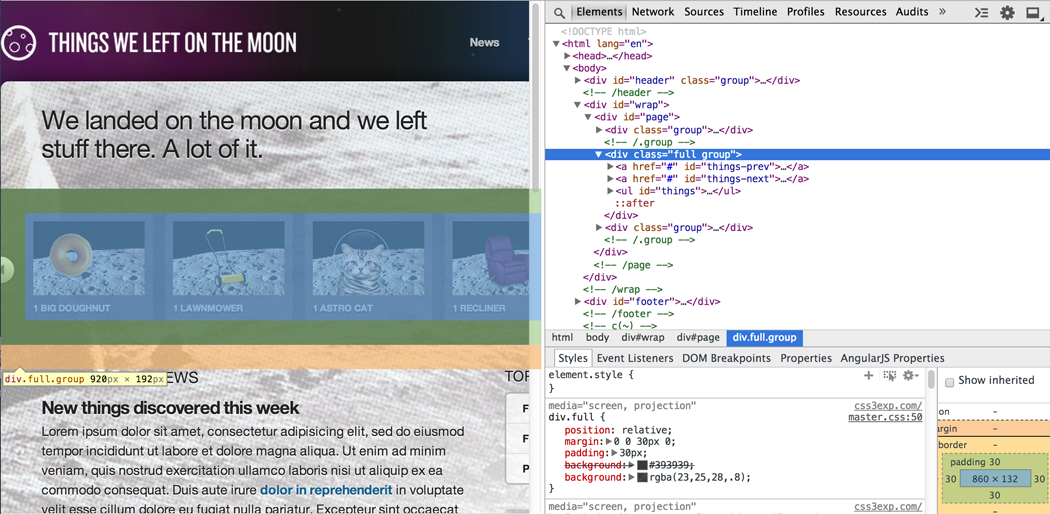
Elements
Color format
- As authored official definition - (how color codes are written in style sheets)
-
HEX:
#DAC0DE -
RGB:
rgb(128, 255, 255) -
HSL:
hsl(300, 80%, 90%)

Color format settings let you control how color codes appear in the Styles Sidebar of the element panel. In addition to setting options for controlling the color code formatting, you can also change the format of the color code by clicking on the gear icon at the top of the style bar.
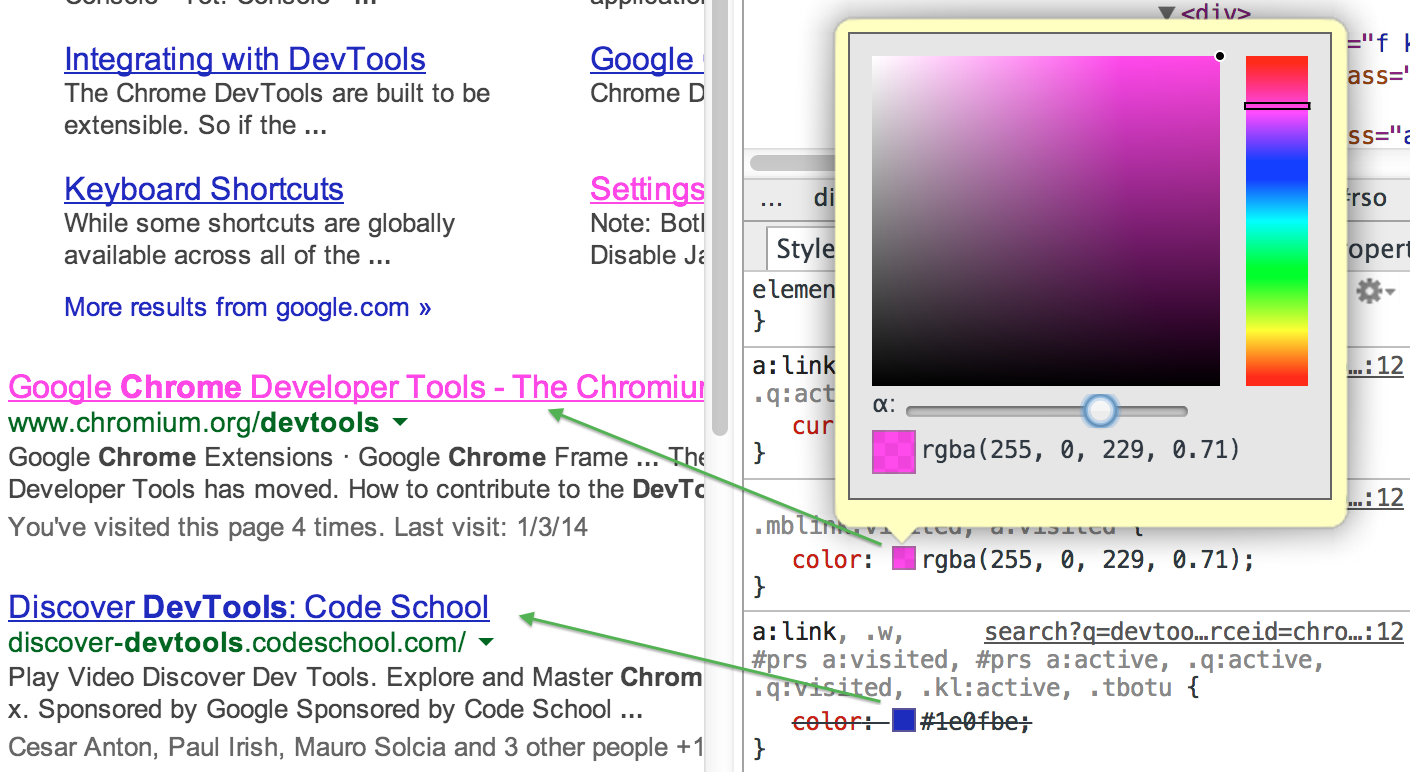
Selecting As authored uses a color format for the properties defined in the style sheet.
Show user agent styles
You may find the user agent style displayed in the style sidebar of the element panel useful.

A user agent is a browser. E ach browser implements a default style sheet, including basic style rules, that are applied to the DOM element on the page. If you've ever had a hard time removing white space between two elements, for example, it might be because the user agent style sheet adds a default margin or padding that points to a particular type of element.
Line-up
As with any text editor, you can selectively line long lines of code in the element panel.
Show Shadow DOM
With shadow DOM, elements can get a new node associated with them. T his new node is called shadow root. T he root element with the shadow associated with it is called the shadow host. T he child nodes of the shadow host are not rendered; Replace rendering with the contents of the shadow root.

- Shadow DOM 201
- Shadow DOM 301
- Shadow DOM Polyfill
- Visualize Shadow DOM Concepts (Visual Shadow DOM Concept)
- Define presentational boxes using shadow DOM (defined using shaded DOM image boxes)
Displays the ruler
This will show a ruler that covers the view port along the top, left, and bottom.

Source Panel (Sources)
Content script search
Content Script is a number of JavaScript files that run on the main body of a web page in a Chrome plug-in, but are completely separate from JavaScript on a normal web page and are in a protected range. In this way, the content scripts and page scripts cannot interact with each other in a normal way.

When you look at the tags for content scripts in the Sources panel, you'll see that two different scripts are added through plug-in modules (or are compiled into plug-ins in Chrome through user scripts User Script), and similarly, content scripts are built into the browser, especially the APIs that plug-ins can use.
Note: Enable this setting when you develop Chrome apps or plug-ins so that you can search through scripts for these native APIs, otherwise it's no use enabling it.
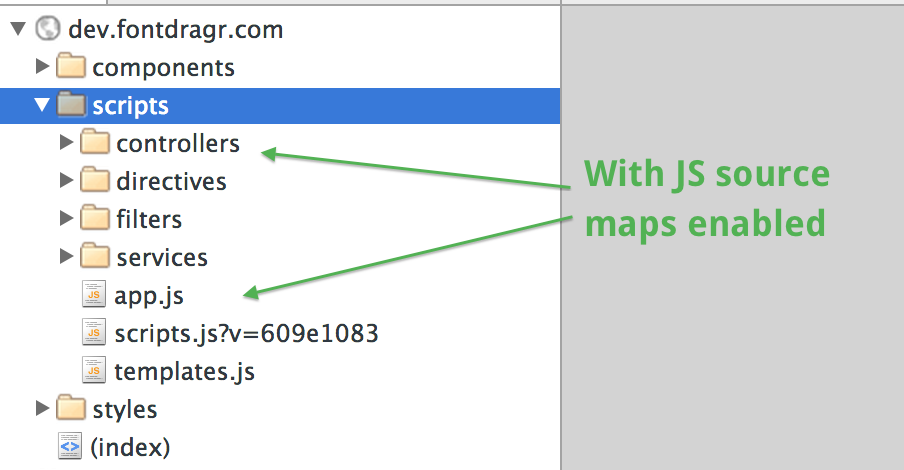
Enable JS source mapping
If your code is cascaded and concise, it's hard to tell when you need to debug what pieces of code in a file might be called. Enabling this setting is useful for debugging JavaScript and mapping activities with general sources.
Enable CSS source mapping (source maps)
source mapping is used to generate CSS files using a preprocessor (example Sass).
For more information, see Using CSS preprocessers.
Automatic reload produces CSS
CSS source mapping is only used if it is enabled. When the source file is saved, determine whether the generated CSS file should be reloaded.
Detect indentation
Specify how to indent when DevTools edits code:
- 2 spaces
- 4 spaces
- 8 spaces
- Tab character
Blank characters are displayed
This displays spaces and tabs as points in the Source panel.
Profiler
High-resolution CPU performance analysis
Allows you to zoom in to 0.1 ms in Flame charts.
Console
XMLHttpRequests log
The objects requested by XHR are displayed in the extended display specific requirements console.
Preserve log upon Navigation
When navigating through multiple pages of a site, you can choose not to clear console logs while loading on each page, so you can observe the historical output on the page.
Note: Both settings can be changed by right-clicking on the console.

Extended
Open the link:
a panel chosen automatically
Workspace Workspace
Workspaces allows you to select a file system in a custom directory that always provides you with edits in the Sources panel. This can be a specific project directory or a directory that contains several different items within it.
To use this feature, open the Workspace tab Workspace tab in the Settings panel. Here you'll see an Add folder link, Add Holder, which allows you to add a local directory to edit (e.g., project root).
Once you add a folder directory, you can view, edit and save any time you edit the files on the Sources panel. All file changes are saved to the local file contained in the path.
In addition to adding a file system to your workspace, you can also individually add a file map to the file's path on the local computer.