Arduino flashes the LED
May 15, 2021 Arduino
Table of contents
LEDs are small bright lights for many different applications. /b10> First, we'll learn about flashing LEDs, the Hello World for microcontrollers. /b11> It's as easy as turning the lights on and off. /b12> Establishing this important baseline will provide you with a solid foundation for more complex experiments.
The required component
You will need the following components:
- 1 × breadboard breadboard
- 1 × Arduino Uno R3
- 1 × LED
- 1 × 330-ohm resistor
- 2 × jumper
Program
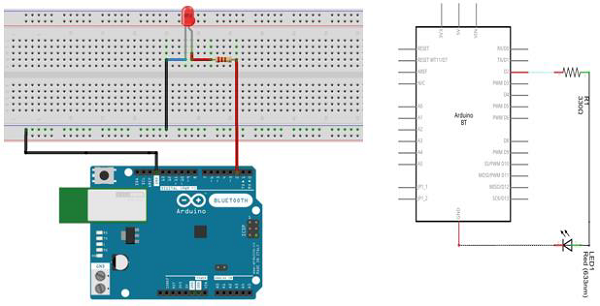
Connect the components on the breadboard according to the circuit diagram, as shown in the following image.
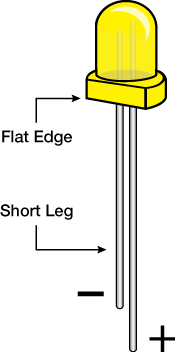
Note - To understand the polarity of leDs, take a closer look. /b10> The shorter of the two legs represent negative extremes toward the flat edge of the bulb.
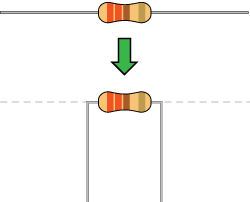
Components such as resistors need to bend their terminals to a 90-degree angle in order to fit the breadboard socket properly.
You can also cut the terminals short.
Sketch
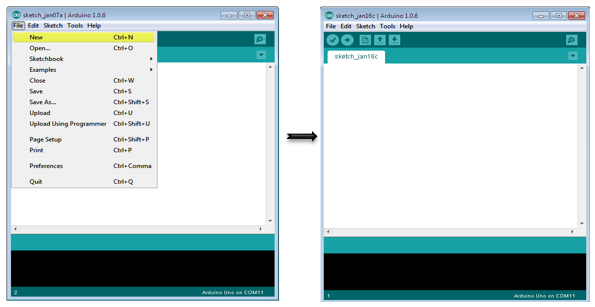
Turn on the Arduino IDE software on your computer. U se arduino to encode and control your circuitry. /b11> Open a new sketch file by clicking New.
Arduino code
/*
   Blink
   Turns on an LED on for one second, then off for one second, repeatedly.
*/

// the setup function runs once when you press reset or power the board

void setup() {  // initialize digital pin 13 as an output.
   pinMode(2, OUTPUT);
}

// the loop function runs over and over again forever

void loop() {
   digitalWrite(2, HIGH); // turn the LED on (HIGH is the voltage level)
   delay(1000); // wait for a second
   digitalWrite(2, LOW); // turn the LED off by making the voltage LOW
   delay(1000); // wait for a second
}
Code description
pinMode (2, OUTPUT) - Before using Arduino's pins, you need to tell Arduino Uno R3 whether it's INPUT or OUTPUT. /b10> We use a built-in "function" pinMode() to do this.
digitalWrite (2, HIGH) - When using pins as OUTPUT, you can command them to HIGH (output 5 volts) or LOW (output 0 volts).
Results
You should see your LED on and off. /b10> If you do not see the desired output, make sure that you have assembled the circuit correctly and that you have validated and uploaded the code to the board.