1.3 Install your Linux system
May 23, 2021 That's what Linux should learn
When installing a RHEL 7 or CentOS 7 system, your computer's CPU needs to support VT (Virtualization Technology, Virtualization Technology). T he so-called VT, refers to the single computer can be divided into multiple independent resource areas, and let each resource area according to the needs of the simulation of the system of a technology, its essence is through the middle layer to achieve the management and redistribution of computer resources, so that the utilization of system resources maximized. I n fact, as long as your computer is not bought five or six years ago, the price is not less than three thousand yuan, its CPU will certainly support VT. If you still prompt for error information such as "CPU does not support VT technology" after turning on the virtual machine, restart your computer and enter BIOS to turn on VT virtualization.
Step 1: You will see the RHEL 7 system installation interface seconds after clicking the "Turn on this virtual machine" button in the virtual machine management interface, as shown in Figure 1-26. I n the interface, Test this media and installation Red Hat Enterprise Linux 7.0 and Troubleshooting are used to verify disc integrity before installing and starting rescue mode, respectively. The Linux system is installed directly by selecting the Install Red Hat Enterprise Linux 7.0 option with the keyboard's arrow keys.
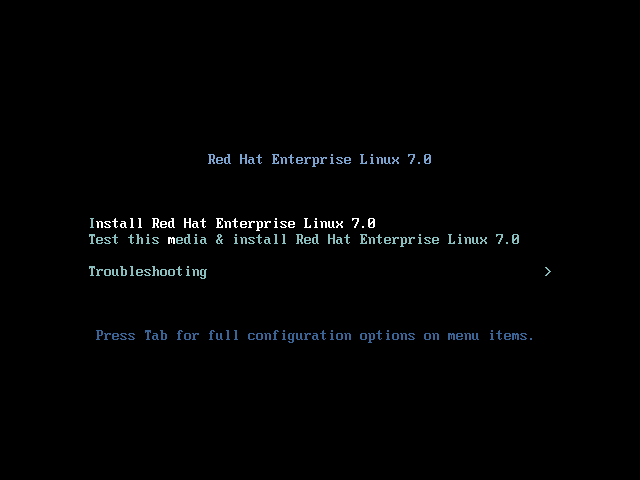
Figure 1-26 RHEL 7 system installation interface
Step 2: Next press the enter key and start loading the installation image, which will take about 30 to 60 seconds, please be patient, as shown in Figure 1-27.
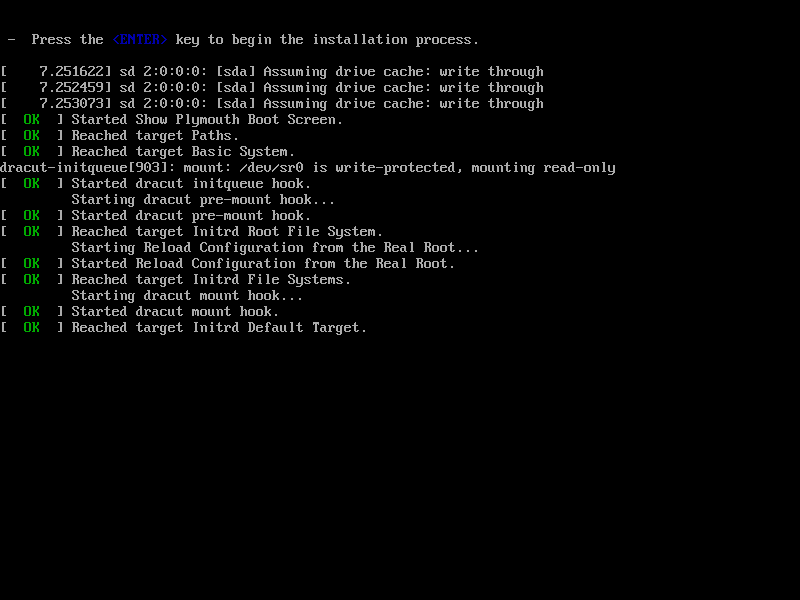
Figure 1-27 The initialization interface of the installation wizard
Step 3: After selecting the installation language for the system, click theContinue button, as shown in Figure 1-28.
Readers are not asked to worry about the basics of English, as the Linux commands used in Linux systems have specific functionality and meaning, not the meaning of the English word itself. F ree, for example, means "free" and "free," and the role of free commands in Linux systems is to see memory usage. S o even if you have a high level of English, you need to re-learn these Linux commands as long as you don't have any Linux basics. M ore importantly, the system set up into English can also exercise english reading ability, unknowingly to the Linux system and English together to learn, would not it be better?! If you are obsessive Chinese the installation language, you can also choose between Figures 1-28.

Figure 1-28 Select the installation language for the system
Step 4: Click the SOFTWARE SELECTION option in the installation interface, as shown in Figure 1-29.
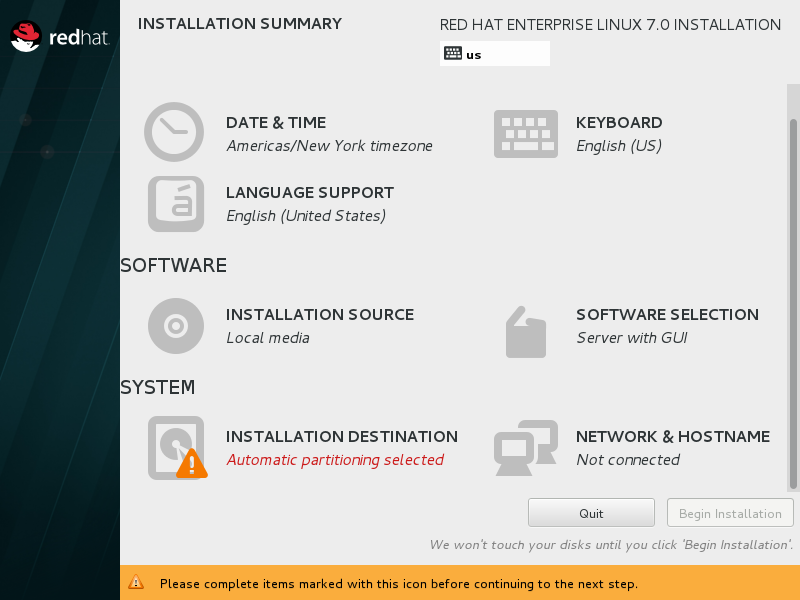
Figure 1-29 Install the system interface
Step 5: The software custom interface of the RHEL 7 system can adjust the basic environment of the system according to the needs of the user, such as using the Linux system as the base server, file server, Web server or workstation. All you have to do is click the Select Server with GUI single button in the interface, and then click the Done button in the upper left corner, as shown in Figure 1-30.
I've seen a news report that an Apple employee added the words "You won't see it anyway" at the end of the iOS user manual. I n fact, this matter can sometimes be used to flirt with the learning status of some readers, Liu Wei teacher will never put useless knowledge into this book, but such a striking screenshot is always a classmate turned a blind eye, the result of the use of the default Minimal Install single button to install THEL 7 system, resulting in a lot of commands can not be executed, service construction is not successful. Please be sure to pay attention!
Mr. Liu Wei's personal training course video introduction: https://www.linuxprobe.com/training
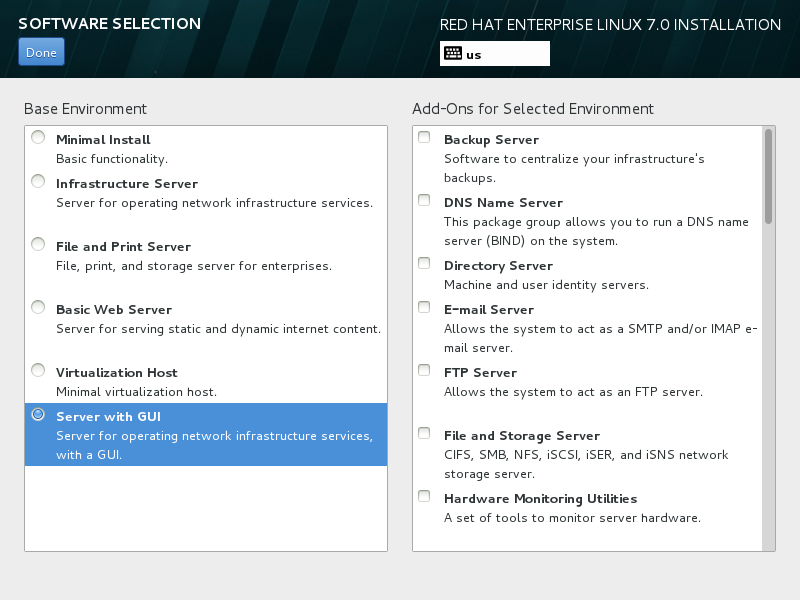
Figure 1-30 Select the type of system software
Step 6: Return to the main interface of the INSTALLATION 7 system installation, click the NETWORK and HOSTNAME option, set the Hostname field to linuxprobe.com, and then click the Done button in the upper left corner, as shown in Figure 1-31.
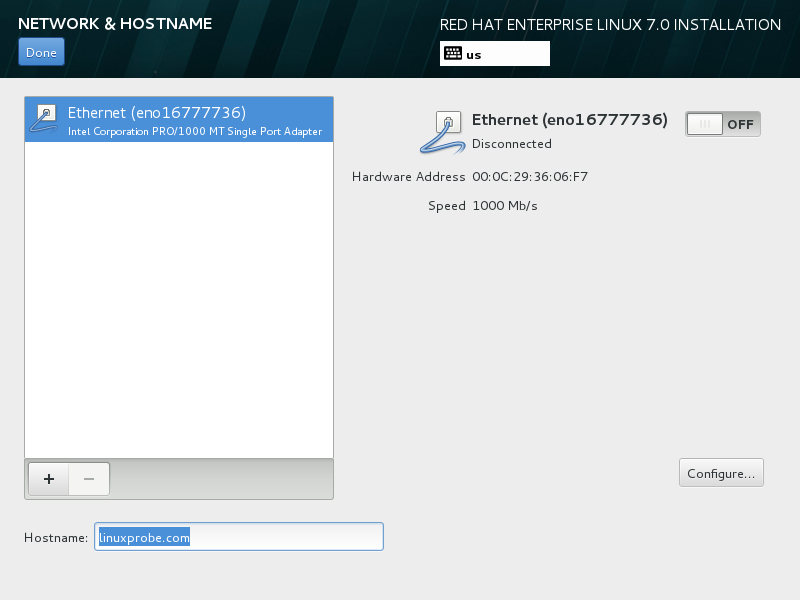
Figure 1-31 configures the network and host name
Step 7: Back to the installation main interface, click the INSTALLATION DESTINATION option to select the installation medium and set the partition. No modifications are required at this point, just click the Done button in the upper left corner, as shown in Figure 1-32.
Readers may be asked, "Why don't we talk about manual partitioning like other Linux books?" T he reason is simple, because the Linux system defines different functions for different directories based on the FHS (Fileystem Hierarchy Standard), which is detailed in Chapter 6. A nd through mr. Liu Wei's teaching experience in recent years, even now write the operation steps, readers are mostly just click the mouse, and can not really understand the knowledge, the effect is not necessarily good, not to mention in the next experiment, manual partitioning relative to automatic partitioning is not obvious benefits. So readers don't have to worry about not learning, the planning course chapters of our books are very scientific.
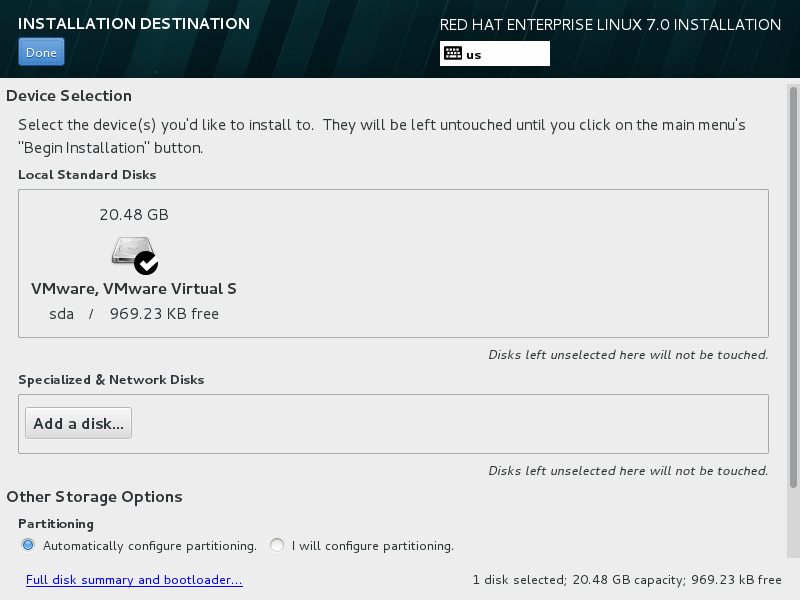
Figure 1-32 Selection of system installation media
Step 8: Go back to the main installation interface, click the Begin Installation button and you'll see the progress of the installation, select ROOT PASSWORD here, as shown in Figure 1-33.
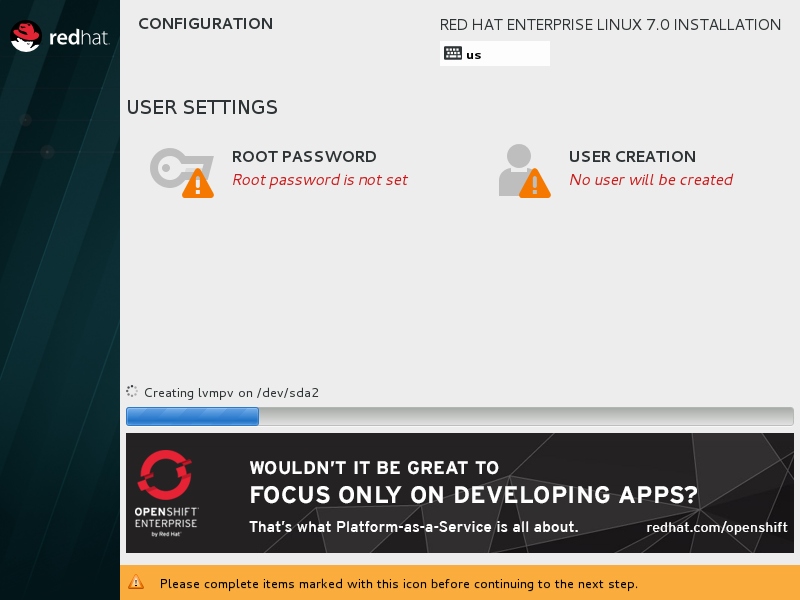
Figure 1-33 Installation interface for the RHEL 7 system
Step 9: Then set the root administrator's password. I
f you stick to a password with a weak password, you need to click the Done button in the upper left corner twice to confirm it, as shown in Figure 1-34. I
t's important to say that when you experiment in a virtual machine, the password doesn't matter how strong or weak it is, but in a production environment it's important to make the root administrator's password complex enough, or the system will face serious security issues.
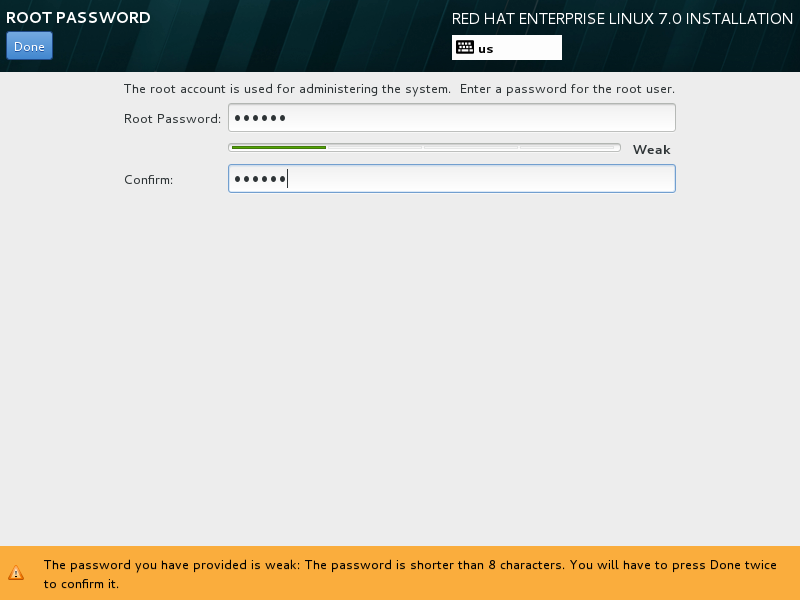
Figure 1-34 Sets the password of the root administrator
Step 10: Linux system installation process is usually 30 to 60 minutes, during the installation process can be patient. Click the Reboot button when the installation is complete, as shown in Figure 1-35.
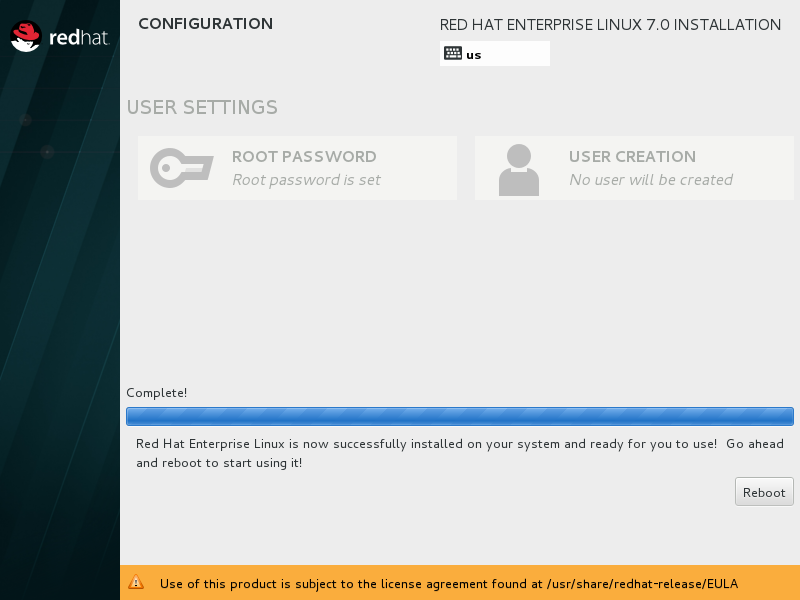
Figure 1-35 The installation of the system is complete
Step 11: After restarting the system, you will see the initialization interface of the system and click on the LICENSE INFORMATION option, as shown in Figure 1-36.

Figure 1-36 System Initialization Interface
Step 12: Select the I accept the license agreement check box, and then click the Done button in the upper left corner, as shown in Figure 1-37.

Figure 1-37 Consent to the license statement
Step 13: When you return to the initialization interface, click the FINISH CONFIGURATION option to see the settings interface for the Kdump service. If you don't plan to debug the system kernel for the time being, you can also uncheck the Enable kdump check box and click the Forward button, as shown in Figure 1-38.
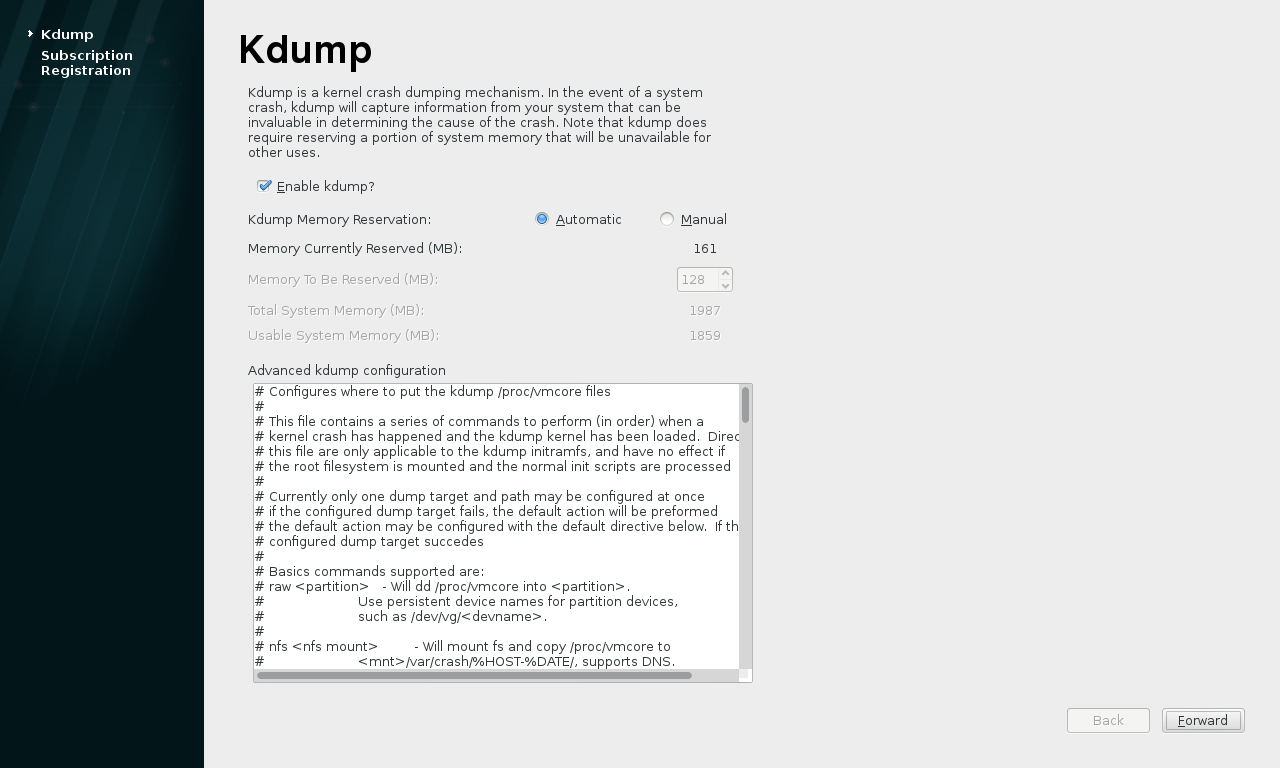
Figure 1-38 Disables the Kdump service
Step 14: In the system subscription interface shown in Figure 1-39, select the No, I prefer to register at a later time option button, and then click the Finish button. The setting here does not register the system to have no effect on subsequent experimental operations or production work.
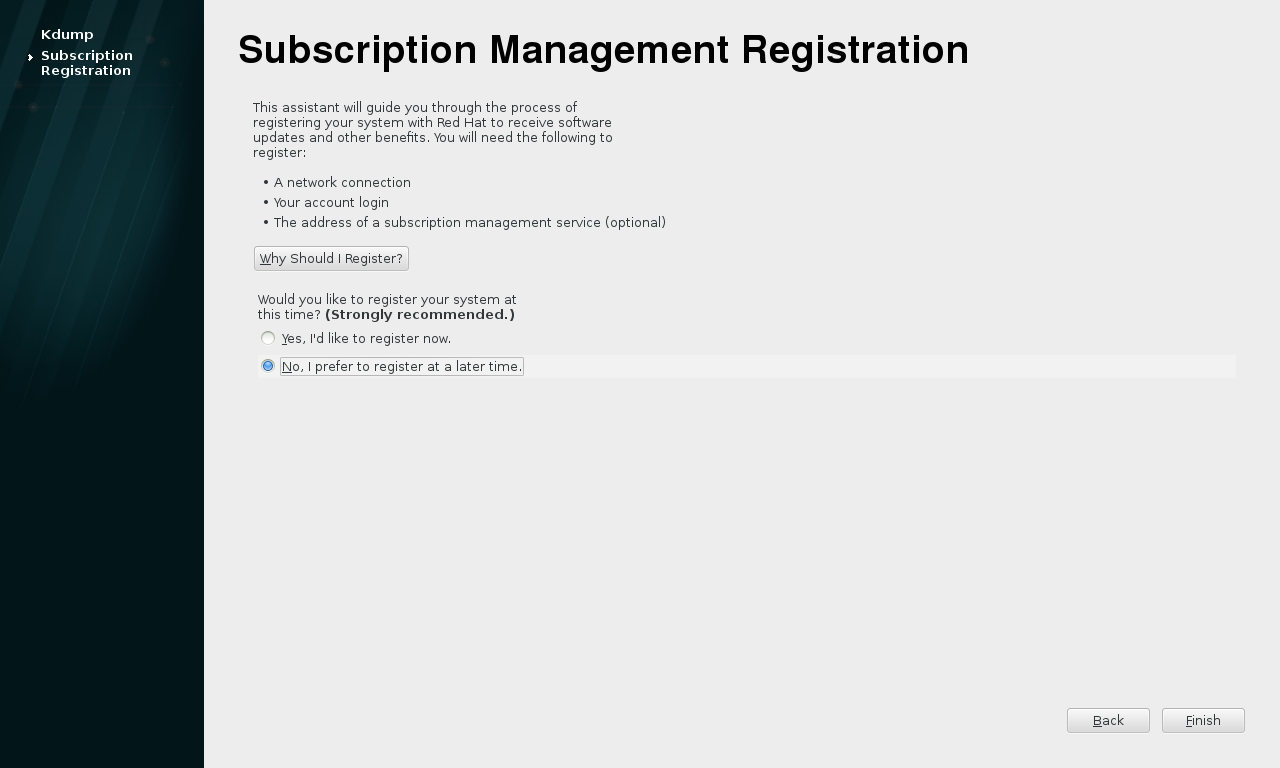
Figure 1-39 Does not register the system for the time being
Step 15: After another reboot of the RHEL 7 system in the virtual machine software, we can finally see the welcome interface of the system, as shown in Figure 1-40. Select the default language, United States, in the interface, and then click the Next button.
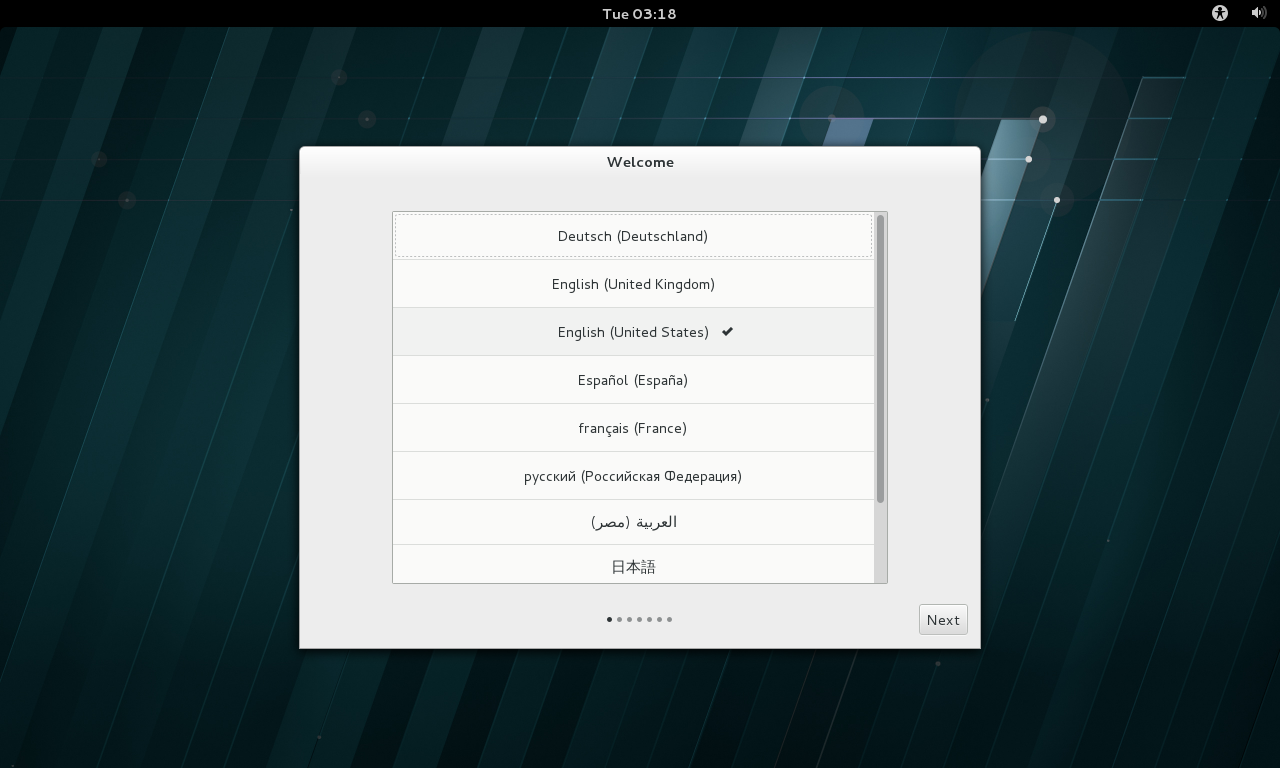
Figure 1-40 The language settings of the system
Step 16: Select the input source type of the system as English (US) and click the Next button, as shown in Figure 1-41.
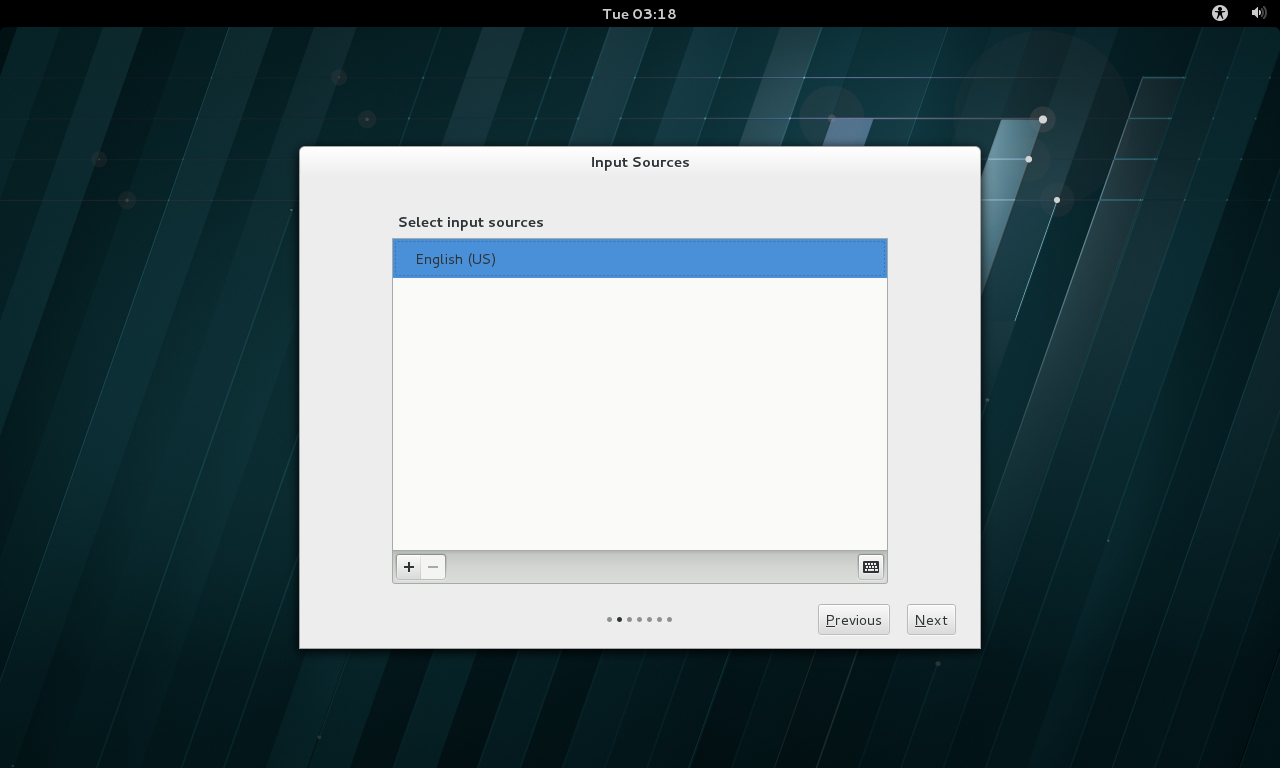
Figure 1-41 sets the input source type of the system
Step 17: Create a local regular user for the RHEL 7 system, the user name of the account is linuxprobe, the password is redhat, and then click the Next button, as shown in Figure 1-42.
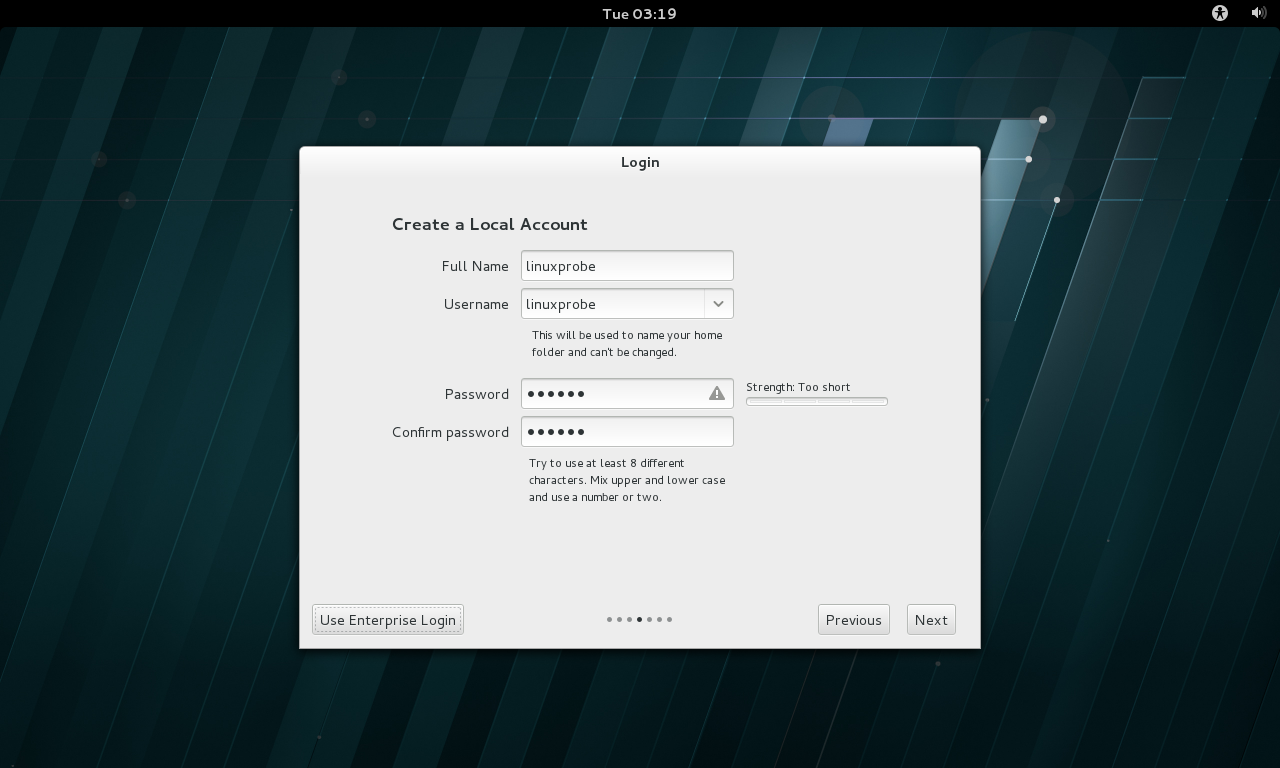
Figure 1-42 creates a local regular user
Step 18: Set the system's time zone as shown in Figures 1-43, and then click the Next button.
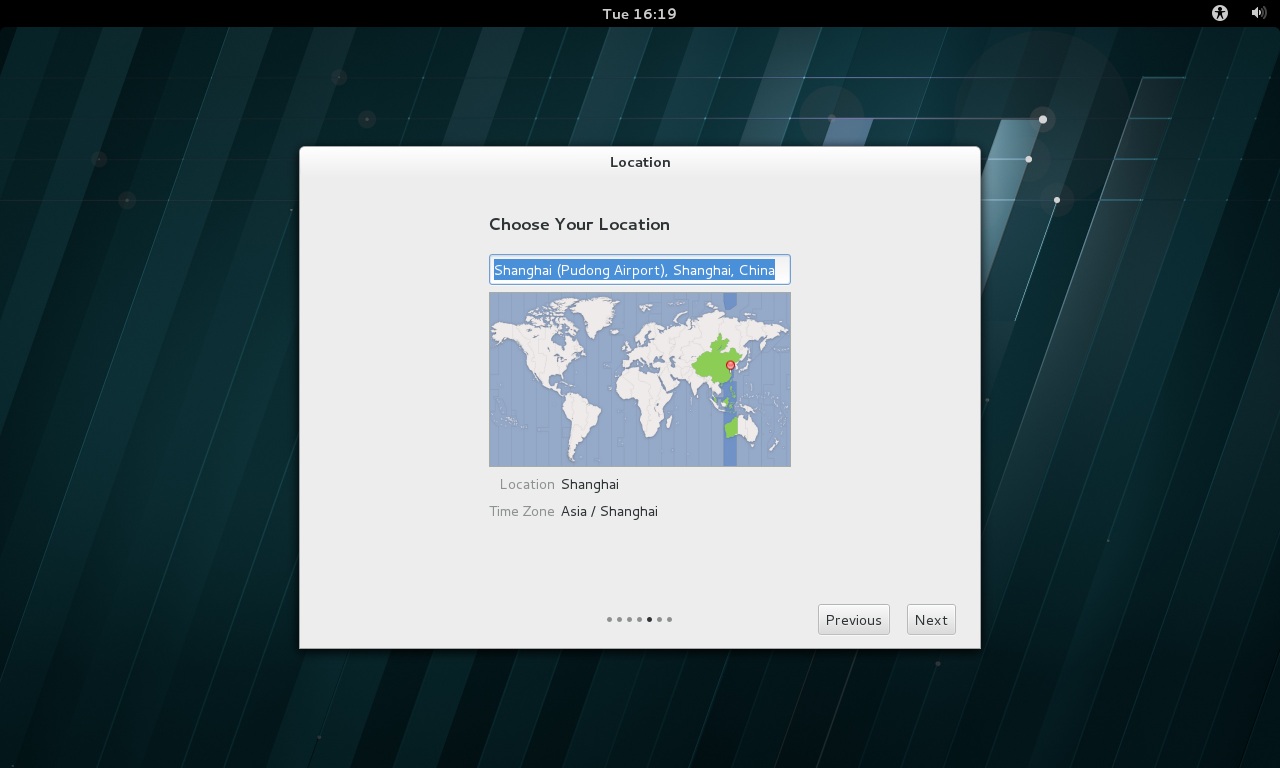
Figure 1-43 sets the time zone of the system
Step 19: Click the Start using Red Hat Enterprise Linux Server button in the interface shown in Figures 1-44, and the interface shown in Figure 1-45 appears. A t this point, the RHEL 7 system has completed all installation and deployment work. Get ready to start learning about Linux.
!
[](h

Figure 1-44 System Initialization End Interface
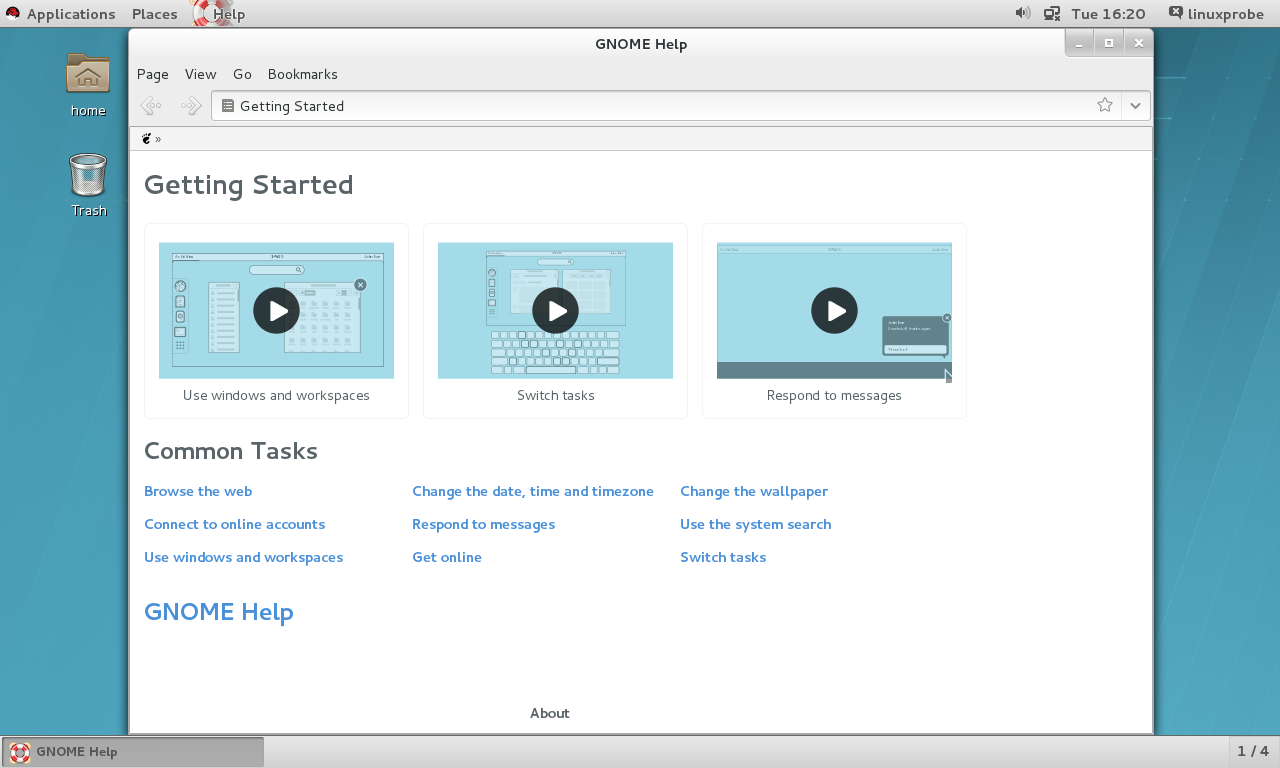
Figure 1-45 The welcome interface of the system